You can still follow this tutorial if you’re using another version of Windows or if you’re using another Android device. You don’t strictly have to use a Windows 7 computer and an LG G3 phone. 🙂
Being a web developer and a frequent user of Android devices, I’ve always been curious about Android app development. I’m really happy that I’m finally able to create even the simplest Android app (i.e., displaying Hello World! lol) 😆
You are on this page most likely because you are just curious like me, or because you need to learn Android app development for school or work.
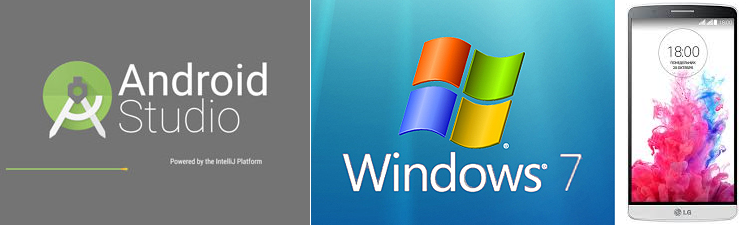
My development environment as I wrote this tutorial:
- 3-year-old ASUS laptop, 32-bit system, 4 GB RAM, Intel Core i5-2410M, 2.36GHz processor (Android Studio is slowing this laptop down significantly)
- Windows 7 (you can use any other Windows version to follow this tutorial)
- Android Studio 1.4
- LG G3 as test device (you can use a different phone, of course)
How to say “Hello World!” on your first Android app
-
Install JDK (Java SE Development Kit)
Download it from this page: JDK (Java SE Development Kit)
Make sure to check if you are using 32-bit or 64-bit Windows and download the appropriate installer version. The installers for 32-bit and 64-bit Windows are not interchangeable. In my office laptop I installed
jdk-7u79-windows-x64.exebut since it is for 64 bit and incompatible with my 32-bit Windows at home, I downloadedjdk-7u79-windows-i586.exefrom the source. -
Install Android Studio.
When someone in your team, or when you download Android Studio completely for the first time, copy the sdk folder from this path and store it somewhere for future use:
C:\Users\YourUsername\AppData\Local\Android\SdkPlease note that this can take a while. It took me about 30 minutes to finish copying in an old laptop that uses Intel Core i5 CPU.
The installation of Android Studio requires Internet connection for the contents of the sdk folder, and it will be trouble if you have a very slow connection to the Internet. It will be handy to keep a copy of the sdk folder as backup, so that every time you need to install Android Studio, you just have to “cancel” the download that doesn’t seem to end (when it says Downloading Android SDK Build-tools) and just paste the contents of your backup sdk folder into the folder where you are currently installing SDK into
D:\Users\YourUsername\AppData\Local\Android\sdk. When you try to start a new project, you might run into an error saying “Your Android SDK is missing, out of date, or is missing templates.” To fix this, do the following:- Click OK to close the dialog then click Configure.
- Click SDK Manager.
- Find the field where you can Edit the path for your Android Studio SDK — click on “Edit”.
- You probably see this message in red: “An existing Android SDK was detected. The setup wizard will only download missing or outdated SDK components.” Just keep on clicking Next until you can see a Finish button
-
Now, you can start a new Android project in Android Studio!
- Press the back button and find the “Start a new Android Studio project” button.
- Set your Application Name and Company Domain. Change Project Location if desired. These are up to you.
- Click next.
- Click next again, leaving only Phone and Tablet as our platform.
- Select “Empty Activity” then click next.
- Change “Activity Name” and “Layout Name” if desired (I leave them as is), then click Finish button. (It is taking ages for my project to load after creation. Ugh! :lol:)
- If Android Studio hasn’t opened
MainActivity.javaandactivity_main.xmlfor you, then follow these steps:- On the left side of the screen, click Project, then in the directory tree, navigate to
app -> res-> layoutthen double clickactivity_main.xmlto open it. - Make sure you are on the “Design” tab (at the bottom part there should be 2 tabs: Design and Text. Click Design.) This will show you a preview of the app that says Hello World!
- On the left side of the screen, click Project, then in the directory tree, navigate to
If you see the “Hello World”, good! I would congratulate you, but if you’re like me, you probably didn’t feel any accomplishment in seeing that Hello World in your computer screen. After all, an Android app is supposed to be run in an Android device. You can stop here, or you can read the next steps as I guide you in setting up your computer, Android Studio, and Android device so that you can run the app you are developing in your phone or tablet.
-
Prepare your Android device for running your app.
Allow me to use the words “phone” and “device” interchangeably — just a little warning to keep you from being confused. 😆 After all, the “device” I’m using for this tutorial is a “phone” 🙂
Install PdaNetfor USB debugging of your phone (ADB driver):
Source: PdaNet download page
- Download PdaNet installer here. Just follow the instructions from the installer during the process. You need to finish this so that Android Studio can run apps on your phone.
- Let me tell you how I successfully let my Android Studio run apps on my LG G3 phone…
- While PdaNet was installing, I closed Android Studio (it consumes a huge portion of memory in mine) during the process, hoping my computer runs the pdanet installation a little faster.
- I installed PdaNet from Google Play Store into my phone, as instructed by the PdaNet installer on my computer.
- After PdaNet was installed to my phone, I opened it and enabled the “Activate USB Tether” option.
- When I run Android Studio again, with my
MainActivity.javaandactivity_main.xmlstill open, I pressedShift + F10to attempt to run the app on my phone. - Yes, my LG G3 was listed as a connected device but Android Studio says that my device is offline.
To fix the “device is offline” problem, what I did was unplug my phone from the computer and then plug it back in. On my phone, there was a prompt to “Allow USB Debugging” and I allowed it. Then, pressing
Shift + F10again on Android Studio allowed me to choose my LG G3 phone. When I pressed OK, the Hello World! screen was displayed on my LG G3. 🙂
Your device is still not able to run your app from Android Studio? Try any of these:
Possible fix #1: Set connection mode on your phone from MTP to PTP
You probably read earlier that unplugging and plugging my device back into my computer let Android Studio detect my LG G3 as an online device. I realized that my connection was already set to PTP back then.
I tried switching to MTP and as a result, Android Studio took out my device from the list.
I switched back into PTP mode and Android Studio brought my device back to the list.
So, that confirmed that LG G3 needs to connect to the computer in PTP mode so that Android Studio can run apps in it.
Possible fix #2: Install LG program/driver(s)
- When you plug your device into the computer, you’ll see something like “Connected as Media Device (MTP)”.
- Go to your notifications panel and click on such notification.
- A popup will appear: “Install PC programs required when connected to computer. -If you have installed on your computer, skip by checking Don’t show this again.” Then if you click OK, you’ll see “Installing PC programs. Please check your PC.”
- On your computer you’ll see AutoPlay dialog, click on Run_LG_PC_Programs.exe.
- Now on your computer you’ll see “LG USB driver for LG phone is being installed”. KEEP THE DEVICE CONNECTED TO YOUR COMPUTER DURING THIS PROCESS!
- When done, you’ll see a message in the computer: “The drivers for LG phone are now installed. You can connect your PC and phone.”
- Click OK.
(If you’re using an LG phone and if this doesn’t work try to install LG drivers from this link too …I had to download that one for my phone to work on my office laptop’s Android Studio. )
Other notes
Each time you run the app, an APK file is generated in app/folder/app/build/outputs/apk/
Thanks, acknowledgement, sources…
Thanks to my office friends Nethki, Allen, and Peng for ideas and guidance, as well as to my boyfriend. 🙂 I probably couldn’t have started anything at all without you all. 😀