Tag: coding

  • Installing git on a macbook

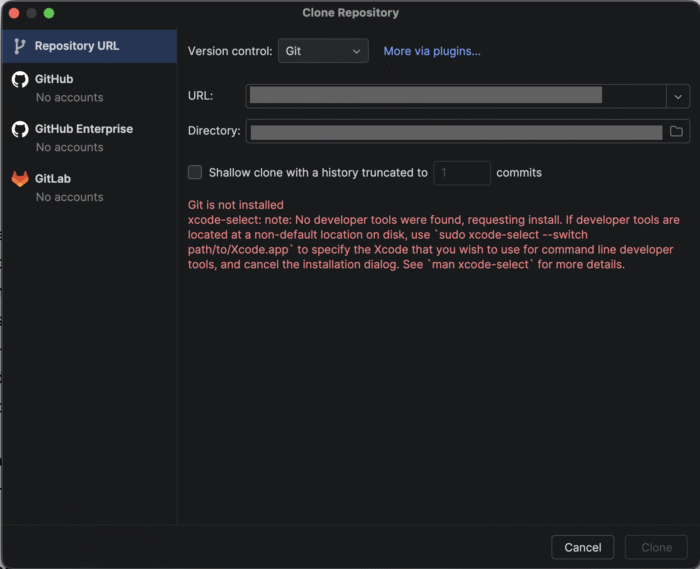
    As I was setting up a new Android Studio installation in a reformatted Macbook, I ran into this issue:
    Git is not installed
    xcode-select: note: No developer tools were found, requesting install. If developer tools are located at a non-default location on disk, use sudo xcode-select --switch path/to/Xcode.app to specify the Xcode that you wish to use for command line developer tools, and cancel the installation dialog. See man xcode-select for more details.

    <!–more–>

    To verify the lack of git in the machine, I ran git --version command for which I got a xcode-select: note: No developer tools were found, requesting install.

    To install git, I ran the following command in my Terminal:
    xcode-select --install

    and got a response:
    xcode-select: note: install requested for command line developer tools

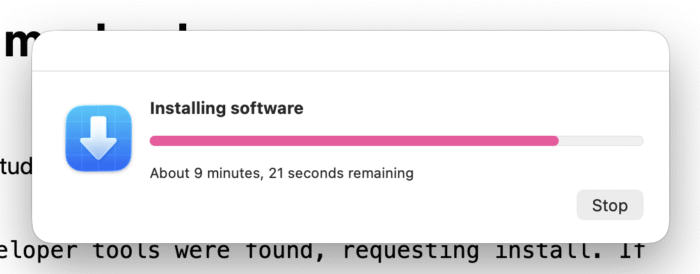
    I initially thought that the git installation wasn’t working, until I finally noticed that there was a pop-up asking for confirmation! I confirmed the installation and right now the pop-up window looks like this as it installs git on my machine.

    As I waited for the installation to complete I asked myself why I write about this. Will it be helpful to anyone? Will anyone even read this page in the future, at the age when AI is most people’s first source of information instead of visiting web pages one by one?

    The answer I had was: Yes, this will surely be helpful to at least one person — me! The reason why I blog about challenges I encounter to begin with (since over a decade ago) is to help myself remember in the future. But, why? It’s because it supports my terrible memory.

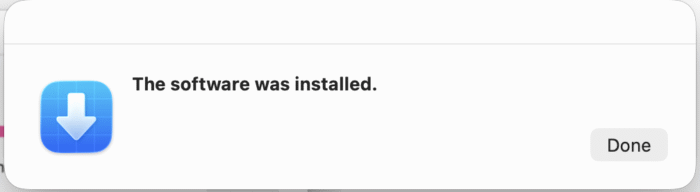
    After a few minutes, “the software was installed”:

    I ran git --version again and finally got this:
    git version 2.50.1 (Apple Git-155)

  • Spoofing Battery and Forcing Sleep (Android Development)

    I wanted to do something with my Android phone using ADB commands, while keeping it plugged in to run the said commands. However, the thing I wanted to test was related to the idle (dozing or asleep) mode of Android devices. The workaround was to spoof the battery state to bypass Android’s charging restrictions.

    Spoofing Battery Charging Status and Forcing Android Device to Sleep (Idle Mode)

    • Turn off the device screen using the physical power button.
    • Trick Android into thinking the device is running on battery power: adb shell dumpsys battery unplug
    • Force the device to step into deep Doze mode: adb shell dumpsys deviceidle force-idle
    • Verify the device is successfully spoofed and asleep: adb shell dumpsys deviceidle get deep (This should return IDLE).

    Can also do:
    adb shell dumpsys battery unplug && adb shell dumpsys deviceidle force-idle && adb shell dumpsys deviceidle get deep

    Device Cleanup for Spoofed Battery and Forced Sleep (Crucial!)

    1. Once testing is done, you must tell the OS to start reading the actual battery state again, otherwise it won’t charge properly: adb shell dumpsys battery reset
    2. Bring the device out of idle: adb shell dumpsys deviceidle unforce

    Can also do:
    adb shell dumpsys battery reset && adb shell dumpsys deviceidle unforce && adb shell dumpsys deviceidle get deep

  • A random dev brain dump

    I don’t need a reason to randomly post a brain dump on my blog, no?

    • If an Android dev wishes to implement a precise “notification ID” that they want to be able to precisely cancel later (imagine that it plays an annoying alarm tone!) they can go about it either by
      • Using a unique ID tied to that notification’s base entity (e.g., an app’s incoming message) so that NOTIFS WILL STACK, or
      • Using a unique, dedicated ID that is defined as a constant and is defined without ties to the notification’s base entity so that ONLY THE LAST NOTIF WILL BE SHOWN
    • I gotta update my site’s, something..
    • If an Android dev’s soft keyboard covers a text input field when it’s displayed, particularly in Android 15 devices, they may wanna try to add an imePadding modifier to the root element (e.g., Box, Column) because this modifier will take care of spacings whenever the keyboard appears, avoiding issues such as covering the text input field.
  • Android: Broadcast sent, receiver registered, but receiver doesn’t receive broadcast

    I should blog more often about things I learn about.

    In a native Android app written in Kotlin, I have a LifecycleService class with below code to send a broadcast:

        val eventIntent = Intent(CUSTOM_EVENT_ACTION_NAME).apply {
        flags = Intent.FLAG_ACTIVITY_NEW_TASK or Intent.FLAG_ACTIVITY_CLEAR_TOP
        }
        applicationContext.sendBroadcast(eventIntent)
        Log.d("AppTag", "Broadcast sent!")


    Based on the logcat, the broadcast is being sent.

    However, below BroadcastReceiver in an Activity doesn’t receive the broadcast, even while it is visible:

    
    private val customEventReceiver = object : BroadcastReceiver() {
        override fun onReceive(context: Context?, intent: Intent?) {
            Log.d("AppTag", "Custom event receiver triggered")
            if (intent?.action == GlobalConstants.CUSTOM_EVENT_ACTION_NAME) {
                Log.d("AppTag", "Confirmed action match, proceeding with task.")
                performSpecificTask()
            }
        }
    }

    The above BroadcastReceiver is registered from the Activity’s onCreate function, like so:

    val filter = IntentFilter(GlobalConstants.CUSTOM_EVENT_ACTION_NAME)
    ContextCompat.registerReceiver(
        this,
        customEventReceiver,
        filter,
        ContextCompat.RECEIVER_NOT_EXPORTED 
    )


    Attempt #1: LocalBroadcastManager – it worked, but…

    After browsing the web for potential solutions I came across LocalBroadcastManager. The broadcast was successfully received by the receiver after I changed the sendBroadcast’s applicationContext and the registerBroadcast’s ContextCompat into LocalBroadcastManager.getInstance(Context).

    That is, LocalBroadcastManager.getInstance(applicationContext).sendBroadcast(eventIntent) and LocalBroadcastManager.getInstance(this).registerReceiver(customEventReceiver, filter).

    The problem with this approach is that LocalBroadcastManager has been deprecated:

    Important changes since 1.0.0

    androidx.localbroadcastmanager has been fully deprecated. There will be no further releases of this library. Developers should replace usages of LocalBroadcastManager with other implementations of the observable pattern. Depending on the use case, suitable options may be LiveData or reactive streams.

    https://developer.android.com/jetpack/androidx/releases/localbroadcastmanager

    Ideally, the solution should not be a deprecated one.

    As to why LocalBroadcastManager made my receiver work, I think it’s because it “bridged” 2 components that weren’t really supposed to be able to communicate. Because from the Android docs:

    LocalBroadcastManager is an application-wide event bus and embraces layer violations in your app: any component may listen events from any other.

    Why it works, and why it’s been deprecated, apparently have the same explanation. 😅

    Attempt #2: Use applicationContext on the sender and receiver — Nope!

    I reverted my code to the original, and just made sure they all used applicationContext, matching the context used in the service’s broadcast sender applicationContext.sendBroadcast(eventIntent).

    So that my registration became:

    val filter = IntentFilter(GlobalConstants.CUSTOM_EVENT_ACTION_NAME)
    ContextCompat.registerReceiver(
        applicationContext,
        customEventReceiver,
        filter,
        ContextCompat.RECEIVER_NOT_EXPORTED 
    )
    
    
    And the code to unregister became:
    
    applicationContext.unregisterReceiver(customEventReceiver)

    Hmm… Nope! that didn’t let my receiver get the broadcast.

    Attempt #3: Make it an explicit broadcast — YES, IT WORKS!

    I reverted my code again to try another approach, which is to make the broadcast an explicit one.

    So, in my service, I simply set the package name as shown in code below:

    val eventIntent = Intent(CUSTOM_EVENT_ACTION_NAME).apply {
        setPackage(applicationContext.packageName)
        //...

    And with this 1 line changed in code, my BroadcastReceiver now receives the broadcast! Plus, there’s no deprecated class used here so we prevented 1 new technical debt. :3

    Yeah, I think I’ll stick to the 3rd attempt’s approach!

    Why does this approach work, though? It’s because starting from Android API level 26, there’s been restriction on implicit broadcasts.

    As part of the Android 8.0 (API level 26) background execution limits, apps that target the API level 26 or higher can’t register broadcast receivers for implicit broadcasts in their manifest unless the broadcast is sent specifically to them. However, several broadcasts are exempted from these limitations. 

    https://developer.android.com/develop/background-work/background-tasks/broadcasts/broadcast-exceptions

    My original code’s broadcast Intent was an implicit one, but specifying a package name converted it into an explicit one, consequently lifting the limitation applied to implicit broadcasts!
  • Disable animations programmatically during instrumented tests // Android Dev Diary

    When running an instrumented Android test, or “androidTest”, and you encounter the following error:

    androidx.test.espresso.PerformException: Error performing 'scroll to' on view 'Animations or transitions are enabled on the target device.

    It means that you need to disable animations for it to successfully run the test.

    But, it can take a lot of clicks on the emulator/device screen to get to the developer settings to turn off animations!

    So, for a quicker way to disable animations in the Android device during development, just enter the following commands in your Android Studio terminal:

    adb shell settings put global window_animation_scale 0.0
    adb shell settings put global transition_animation_scale 0.0
    adb shell settings put global animator_duration_scale 0.0
  • Fix coroutine error: Cannot access database on the main thread // Android Dev Diary

    As I was running a test for a ViewModel function, I encountered the following error:

    [...] Main Thread @coroutine java.lang.IllegalStateException: Cannot access database on the main thread since it may potentially lock the UI for a long period of time.

    I think it may be caused by the viewModelScope from viewModelScope.launch {} being used by the running test, which may not be accessible during unit tests.

    What I did to fix this error on my unit test was to enable main thread operations in my in-memory Room database test instance. I simply added .allowMainThreadQueries() while building the database instance like so:

    db = Room.inMemoryDatabaseBuilder(
        context, MyRoomDatabase::class.java)
        .allowMainThreadQueries()
        .build()

    Is that the best way to do it? If you got a better suggestion, please comment! I’d love to hear about it.

  • Remove room database on app uninstall // Android Dev Diary

    The problem:

    Installing on an Android device that has an old version of an app I’m developing triggers an error:

    Room Database Migration: java.lang.IllegalStateException: Migration didn't properly handle

    Problem persists despite uninstalling the Android app and deleting all app data.

    The solution:

    Very simple. I set allowBackup to false in my AndroidManifest.xml file like so:

    android:allowBackup="false"

    Then I reinstalled the app on the Android device. Error was still triggered on first install, but after one more round of uninstall and reinstall, the error finally went away!

    Side Note / Quick Life Update:

    I have been working on an app, with me as its first user. I tentatively call it “bodymonitor”. It should let me log foods I ate, meds/supplements I took, and body sensations. My brain does not do a good job of monitoring these things so I shall get an app to help me do it. There are existing apps out there that do more or less the same thing, but I want one that caters to my specific needs. Doesn’t hurt to practice Android app development as I make the app, too!

    This weekend I’ll undergo endoscopy again, but this time it’s called a “flexible nasopharyngolaryngoscopy” which will pass through the nose instead of the mouth, to be done under local anesthesia. From the sound of it I don’t expect to be put to sleep, which makes me less anxious, but still anxious. XD It’s gonna be done because of my throat issues.

  • A working shared ViewModel between parent and child Fragments //Android Kotlin Dev Diary

    I initially had a problem with the shared ViewModel because the child fragments were creating a new instance from the one held by the parent fragment.

    The ViewModel instantiations below work for me:

    CreateLogFragment.kt (parent)

    CreateLogFoodFragment.kt (child)

    CreateLogNotesFragment.kt (another child)

    by activityViewModels turned things around!

  • Two NavHosts with their own NavControllers and NavGraphs (Navigation Component) //Android Kotlin Dev Diary

    I am trying to make a single-activity app because I’d like to easily share data across screen using, ideally one, or as few as possible ViewModels.

    NavGraph 1

    Host: Layout file of MainActivity

    Destination(s): CreateLogFragment

    NavGraph 2

    Host: Layout file of CreateLogFragment

    Destination(s): CreateLogFoodFragment, CreateLogNotesFragment

    (CreateLogFragment has a BottomNavigationBar that switches between CreateLogFoodFragment and CreateLogNotesFragment)

    The problem was that NavGraph 2 was not getting the correct NavHost and NavController in the CreateLogFragment class.

    And the solution is to retrieve the NavHost in CreateLogFragment like so:

    override fun onViewCreated(view: View, savedInstanceState: Bundle?) {
    super.onViewCreated(view, savedInstanceState)

        val navHostFragment = childFragmentManager.findFragmentById(R.id.nav_host_create_log) as NavHostFragment
        val navController = navHostFragment.navController
    
        // Setup Bottom Nav
        val bottomNav: BottomNavigationView = binding.bottomNav
        bottomNav.setupWithNavController(navController)
    }

    I’d like to write a full tutorial on how to do this but I’m not sure if I could spare some time. If you’ve been reading my recent posts you’ll notice that I’m not able to put it so much effort in explaining everything. These days I’m always in a hurry to finish stuff. But I’ll still try!!

  • My Fave Android Studio Keyboard Shortcuts

    I have been working on small Android apps, and I just want to share some of my favorite keyboard shortcuts. Some of them were manually added by me.

    Keyboard shortcuts are one of my must-haves for productivity as a programmer, as they let me navigate through code faster, allowing me to focus on creating new modules and solving problems.

    Note: I am using Windows.

    Move between Code, Split, and Design when working on an XML layout file

    Alt + Shift + Left/Right Directional Button
    (If it doesn’t work, click on the layout file’s code/design first, then retry.)

    Run app in test device or emulator

    Shift + F10

    Run app in test device or emulator with Debugger

    Shift + F9

    Navigate between open tabs (no split):

    Navigate between points/screens that you’re viewing:

    Ctrl + Alt + Left/Right

    Show Parameter Info while filling in a function call

    Ctrl + P

    Maximize/minimize editor

    Ctrl + Shift + F12

    Created a custom shortcut for Close All Tabs:

    Ctrl + Alt + Shift + F4

    Created a custom shortcut for Rebuild Project:

    Ctrl + Alt + Shift + F10

    Created a custom shortcut to toggle Distraction-Free Mode on/off:

    Ctrl + Alt + Shift + D

    Created a custom shortcut to toggle ZenMode on/off:

    Ctrl + Alt + Shift + Z

    Other keyboard shortcuts: https://developer.android.com/studio/intro/keyboard-shortcuts