Category: Legal Documents

  • How to Get a PWD ID in Makati City (Plus MAC Home Visit Process)

    Getting a PWD ID in Makati City has many benefits especially if one has expensive maintenance meds to buy regularly. But navigating local government processes adds to the burdens as PWDs. If you live in Makati and need to apply for a Person With Disability (PWD) card, this guide covers things you need to know — including details from an actual home visit experience from the Makati Action Center (MAC).

    I’ll do my best to share exact step-by-step processes, the updated requirements, and a handy tool to help you calculate your discounts once your PWD ID arrives. Note: my source, Renato, got theirs from Bangkal’s Makati Action Center.

    📋 Requirements for a Makati PWD ID

    • Six (6) copies 1×1 ID Picture
    • Latest COMELEC Certification (for minors, Voter’s Certificate of parent/guardian is required)
    • Barangay Certification
    • Duly accomplished PWD Profile Sheet
    • Medical Certificate with classification of disability and duration of the validity of the ID (recent) or Certification on Disability signed by the Brgy. Health Center Doctor with duration/validity of the ID.

    🚶‍♂️ Step-by-Step Application Process

    1. Obtain the Application Form and PWD Profile Sheet from the Persons with Disability Affairs Office (PDAO);
    2. Fill out the Application Form and PWD Profile Sheet accurately and completely;
    3. Affix one (1) ID picture on the accomplished Application Form and staple the other ID pictures with the PWD Registration Form (PWD-RF);
    4. Attach a copy of the required documents to confirm the medical/disability condition/s of the applicant;
    5. Submit the accomplished PWD-RF and all the requirements to the MSWDPDAO;
    6. Claim PWD ID, Purchase Booklet and Movie Booklet after three (3) working days from the date of submission.

    Extra step for PWD ID Application – Barangay Health Center (Experienced in Bangkal, Makati City)

    My source followed up with additional info based on their experience in getting a PWD ID from Barangay Bangkal, Makati City:

    1. If applicable: Bring medical certificate from your doctor, stating that you are eligible for a PWD ID (Note: Not sure if anyone was already able to acquire a med cert directly from the barangay’s doctor, without a pre-requisite med cert from their personal doctor. Let me know your experiences, too, guys!)
    2. Get medical certificate from Barangay Health Center’s doctor to certify that you are eligible for a PWD ID (It’s like showing a pre-requisite med cert in order to acquire a version that is officially recorgnized in the Barangay Hall.)
    3. Submit that medical certificate along with other requirements

    To quote my source:

    “Sa naalala ko, we went to MAC first and they advised us kumuha ng medical certificate from the Barangay Health Center [in Bangkal]. Dun namin binigay med cert from psychiatrist and they gave us a med cert from the barangay’s doctor after a few days [and submitted that during application for PWD ID in Makati.]“

    It sounded like there were several back-and-forths during their PWD ID application process.

    The MAC Home Visit and Delivery (Renato’s Experience)

    Unlike many other cities, Makati requires a home visit as part of the requirements to acquire a PWD ID.

    According to Renato, a Makati resident who applied for PWD ID in the year 2022, the home visit was like this (Pasting their write-up that they were supposed to share in their own blog, but never got to, which they attribute to their ADHD. lol. )

    “Today, Kuya Jun from Makati City Hall / Makati Action Center visited my home as part of the process to apply for a PWD ID.

    It was an anxiety-inducing wait since it’s a “surprise visit” that may happen any time within 2 weeks after PWD ID application. This was to verify that I am really a resident of the address I provided during my application. My disability’s symptom is mostly executive dysfunction from ADHD, which requires that I plan every single activity in my day, otherwise I won’t be able to accomplish most of my responsibilities.

    It was a good timing that Kuya Jun arrived before my day started so I don’t have to stop what I’m doing.

    He asked me to fill out a form. I wonder why they make me fill out so many forms. I already filled out a similar form during my application on July 1, 2022.

    PWD ID will be delivered in 1-2 weeks from now. It’s a bit frustrating because at Makati Action Center, I was told that I should receive my PWD ID 2 weeks after application. This week is already the second week after application, and now I have to wait another week or two?

    I told Kuya Jun about my concern and he asked if I already need the PWD ID ASAP. I said yes, because I need it to buy medications in discounted price. He put my mind at ease by telling me that the 1-2 weeks estimate has a buffer, and it’s possible to get the PWD ID in less than 1 week. He also said that he’ll try to expedite the processing of my application with Makati City Hall so that I receive my PWD ID soon.

    Some things don’t sink in fully in my mind unless I hold an object that proves that something happened. I’ve been diagnosed with ADHD Inattentive-Type decades after suffering from its symptoms in the dark, and it’s a life-changing event. So all the struggles I go through while doing simple things that other people seem to accomplish without much effort, were caused by a mental, congenital disability? Owning a PWD ID, as well as the new experiences (like weird looks I may get from other customers as I’m not on a wheelchair) that I’ll gain while using it in establishments, will help everything sink in. Once everything fully sinks in, I’ll be more able to plan what I want to do in life around my disability.”

    – Renato (a Makati resident), 2022

    📱 Maximize Your New ID: Free PWD / Senior Citizen Discount Calculator (for Android devices)

    Being a member of a family with several senior citizens, I regularly transact with establishments using senior citizen discount IDs. So, a few years ago, I developed a free Android app that calculates the expected discount for transactions that used a Senior Citizen ID or a PWD ID card for availing discounts.

    Once your Makati PWD ID arrives, calculating your 20% discount and VAT exemption at restaurants and pharmacies can be confusing.

    Make your life a little easier as/with a PWD or Senior Citizen. Download my free app on Google Play:

    Senior/PWD Discount Calculator (For Android)

    Why it’s helpful:

    • Instant Math: Computes your exact payable amount instantly, factoring in VAT exemption.
    • No arguments: Shows you the exact math so you know you are billed correctly at fast-food chains and drugstores.
    • Free: No money need be shelled out here. Life’s already expensive for PWDs and senior citizens.
    • Tried and tested: Me and my family have personally tried and got accurate discount computations from this app.

    [Download the PWD Discount Calculator here]

    I can almost hear complaints for IPhone users as they read the “for android” bit. Hehe. Maybe one of these days I could try to make at least a web-based version, if not an IOS app one? We’ll see.

    💡 Final Tips for getting a PWD ID for Makati Residents

    Applying for a PWD ID locally through your Barangay MAC can save you a trip to Makati City Hall. Make sure your contact details on the form are accurate so the MAC personnel can easily find your home for the home visit! Best of luck to you or to your loved ones who wish to apply for a PWD ID in Makati~ Remember, only real PWDs should apply for PWD IDs. Fake PWDs, scram!!

  • How to get Voter’s Certification at Makati (Requirements, Price, Location)

    How to get Voter’s Certification at Makati (Requirements, Price, Location)

    Today we went to COMELEC to request voter’s certificate.

    It is near Makati City Hall, along Morong St. near its intersection with F. Zobel St. The building says “Gen Pio Del Pilar High School” but Google Map says that the school is permanently closed. For the exact location of COMELEC, see the map above.

    Once past the gate, the guard will ask for your barangay name, as the window where you’ll request the voter’s certificate will depend on the barangay where you reside.

    The staff that caters for people from Barangay Bangkal Makati only asked for two requirements: 1 valid ID and a fee of 75 pesos. I think the price of voter’s certification for PWD is zero.

    There was no queue at the time we went, so the process was pretty fast. We received our voter’s certificate within 5 minutes!

    I was worried that it might be difficult for me to get my voter’s certification, because my records here in Makati is still in my maiden name. So I presented an old ID with my maiden name, but the address is not in Makati! The staff still accepted it, to my relief. Anyway, I already submitted a request to change my name before the 2022 election, but they did not change it. I don’t want to go through the process again so maybe I will just use my maiden name next election.

  • Rush Postal ID Renewal Requirements, Price, Procedures 2021

    Rush Postal ID Renewal Requirements, Price, Procedures 2021

    We went to the Manila Central Post Office on February 1, 2021 to renew our postal ID. I’ll update this post to write about our experiences, including postal ID renewal requirements, price, and procedures. Please note however, that the info I’ll write will mostly be about Postal ID renewal in 2021, since that’s what we did.

    Our experience in renewing our Postal ID at Manila Central Post Office

    In summary, it was a tiring task to renew our postal ID at the Manila Central Post Office. The line was very long, not to mention the discomfort of wearing mask and face shield at all times amidst the pandemic. Our expectation was that there would only be few people in line just like when we applied 3 years ago, and since people should be less willing to be outside their homes due to the pandemic. We were so tired and hungry after waiting in line for about 4 hours. You guys, if you don’t need your Postal ID ASAP, maybe choose a post office or capture station that DOESN’T offer processing! 🥵

    We got our original Postal ID from SM North EDSA in 2018 January. Its expiration is after 3 years, so we had to renew this year 2021. We chose to renew ours at Manila Central Post Office. Rush Postal ID renewal and application is accepted there. Upon arrival, at first we were like “whoa, ang ganda pala dito!” but a few seconds later, we were like “Ohshi* ang daming tao!!!” in shock by the number of people in line ahead of us. Maybe you guys should plan to go early. Hehe. We arrived there around 11AM. Later on we found out that it’s because that post office was one of the few places that offer rush processing.

    After having our application forms, old Postal ID and its photocopy inspected near the entrance, the guards led us to a seated queue. We waited so long (about 2 hours?) until it was our turn to proceed to the next area for processing.

    We fell in line in the next area where the staff assessed our requirements again before asking for our payment. An irritating hiccup happened there. The staff said she can’t issue receipt for regular processing, as she was only processing rush applications/renewals. So we had to fall in line all over again! It was really a hassle, because the guards didn’t even lead us to the line where the cashier can process non-rushed ones, when it’s clear in our application forms that we were going to go for regular processing.

    After trying to calm ourselves down and having over our payment, we proceeded to the data capture section to get our photos and fingerprints taken. It’s during pandemic so it was a bit scary to take off our masks during photo shoot, and to press our fingers on the fingerprint capturing device where hundreds/thousands of people pressed theirs… but it had to be done. If you’ll also go for it during pandemic, just be extra careful okay? Take off your mask only when necessary, put it back right after your photo gets taken. Sanitize your hand right after your fingerprints are captured. My face was so shiny in my photo; it gets very oily when stressed out. My face is round and quite pale too, so it really resembled the moon back then.

    What are the requirements to get Postal ID

    When we applied for a Postal ID in year 2018, the following were the requirements that we presented:

    1. 2 accomplished postal ID application forms
    2. Birth certificate, 2 valid IDs, or passport
    3. Barangay clearance, proof of billing, NBI clearance, or police clearance
    4. Marriage contract if you are a married woman
    5. Photocopy of all documents except the postal ID application forms

    When we renewed this year 2021, we only brought

    1. 2 copies of filled out application form
    2. Old Postal ID
    3. Photocopy of old Postal ID

    Postal ID Procedures for Renewal

    I don’t know about the procedures in other post offices, but following were the procedures we followed when we renewed our Postal ID in Manila:

    1. Bring your requirements to the post office or capture station of your choice
    2. Present requirements for initial assessment
    3. Payment
    4. Digital photo and fingerprint capture
    5. Delivery/Pickup (30 days to deliver for regular. Does anyone know how long it takes for the rush-processed? Please comment.)

    Postal ID Renewal Price

    504 for regular processing

    650 for rush processing of Postal ID.

    Concerns regarding postal id application and renewal:

    postal id renewal online

    Currently, postal ID renewal is not available online.

    paano mag renew ng postal id?

    To renew your postal ID, you simply need to bring 2 accomplished copies of the postal ID application form and your old Postal ID to the capturing station or post office. The staff/guards will guide you on where you should proceed for every step. Try to come early because it can be crowded.

    postal id capture stations

    To see the list of capture stations for getting a Postal ID, check this page of the official Postal ID PH website: where to apply for the improved Postal ID?

    Postal ID verification

    You may be looking for the Postal ID Verification app for Android devices.

    Postal ID follow up

    If your residence in Makati you may follow up your postal ID application/renewal with Makati Central Post Office, and if your residence is in Manila, you may follow up with Manila Central Post Office. For residences of other cities, try contacting your main post office to follow up.

    Postal ID form example

    Here’s an example photo of the Postal ID application form

    Picture

    Postal ID sample

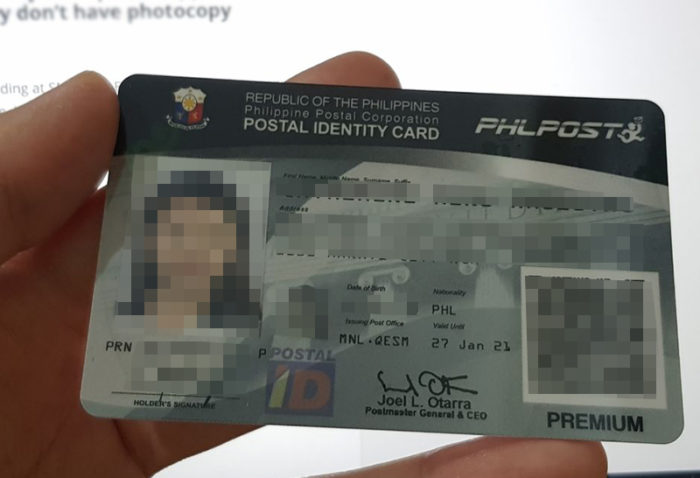
    This is a sample of what a Postal ID looks like:

  • How to register business name with DTI online, and my own experience

    How to register business name with DTI online, and my own experience

    I just got my business name certificate from DTI today! The best thing about it is that I went through the entire process online, even the payment part. 😉

    You may register a business name with DTI online by using the BNRS (Business Name Registration System). I cannot say that it was a smooth transaction — it was very frustrating so many times because they are currently upgrading their system (sometimes it works, sometimes it’s broken), but in the end, after a few days of trying again, I finally finished the business name registration process with DTI.

    Please be aware that this guide was written on Sept. 27, 2019 and there may have been changes on the BNRS that I do not know of, making the info here inconsistent from the actual process. The BNRS is still under frequent upgrades. There’s often an update when I visit the website.

    Steps to register your business name registration with DTI online

    1. Propose a business name
    2. Pay for business name registration
    3. Download business certificate, undertaking document, and official receipt

    The process to register business name with DTI online

    Before I was able to fill out my business information, accessing the BNRS (business name registration system) was a pain. Then website was often down, and I tried accessing it every day, until it was stable and let me fill out my info.

    Fill out Owner’s Info

    First, the BNRS will ask for the Owner’s Information. Fill it out with your personal information.

    Business Scope section

    Next, you need to choose the Business Scope:

    National: 2,000 PhP
    Regional: 1,000 Php
    City/Municipality: 500 PhP
    Barangay: 200 PhP

    I chose Regional because it’s the largest scope I’ll be covering with my business in the next 5 years.

    Business name proposal for registration with DTI

    In the same page, below the Business Scope section, you’ll have to enter the business name to be registered with DTI online.

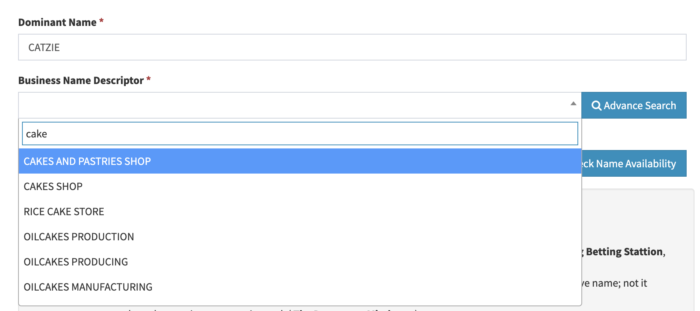
    Provide a Dominant Name which serves like your business name’s “proper noun”. In the screenshot below it’s CATZIE. Then, select a Business Name Descriptor, which should describe the type of business you’re running.

    The screenshots from here onward will only serve as an example, the name of the business I actually registered is different.

    DTI business name registration system: selection of business name descriptor

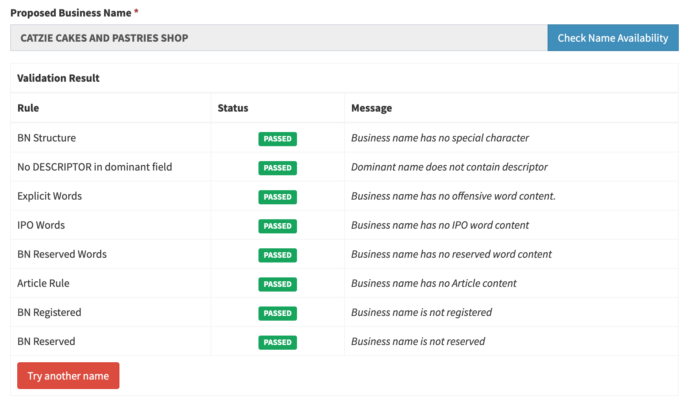
    After selecting the descriptor, the BNRS will display a Proposed Business Name. They will combine the dominant name + descriptor. Click the Check Name Availability button to see if it’s not taken yet, and to validate if such name is allowed. An example is shown in the screenshot below:

    Passing the validation of proposed business name in the DTI business name registration system

    Business name proposal guidelines:

    I am cens*ring some of the words, lest my blog gets a bad marking from Google! Loko yaang DTI, b**bs massage and spa daw?! I only copied the following from the official DTI website:

    It is the applicant’s responsibility to ensure that the proposed business name is:

    not and will not be used for business that is illegal, offensive, scandalous, or contrary to propriety ( Pop’s Juet*ng Bet*ing Station, B**bs Massage and Spa);

    not the same or nearly the same as an existing registered business, company, partnership, corporation, cooperative name; not it infringes on any trademark, service mark and tradename (Anne Dok’s Lechon, Jolibee, Starbax Cafe);

    not composed nearly generic or geograpic words( The Drugstore, Mindanao);

    not a name which by law or regulation cannot be appropriated (OTOP, Intelligence, State College);

    not used to designate or distinguish, or suggestive of quality of any class of goods, articles, merchandise, or service (Best Taho Factory, A-1 Auto Repair Shop);

    not used by the government in its governmental functions (NBI Private Investigation Services, DTI Trading);

    not a name or abbreviation of any nation, inter-governmental or international organization (Philippine Manpower Pooling Agency, UNSECO Marketing, WHO Health Services); and

    is not deceptive, misleading or which misrepresent the name of business (“GOLD Construction Services” where nature of business is recruitment).

    https://bnrs.dti.gov.ph

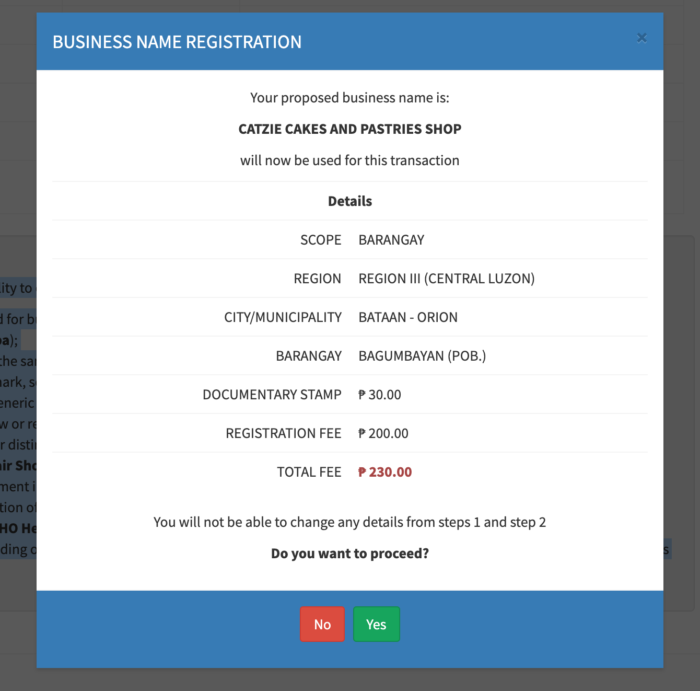
    Confirmation of business name registration

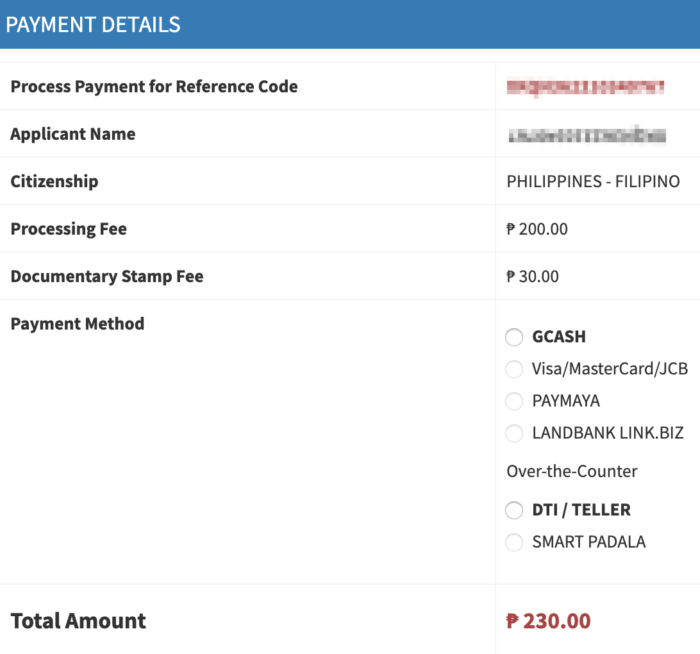
    The total fee for business name registration on Barangay level will be 230 PhP. The extra 30 PhP is for the Documentary Stamp. If everything seems to be in order, click the Yes button.

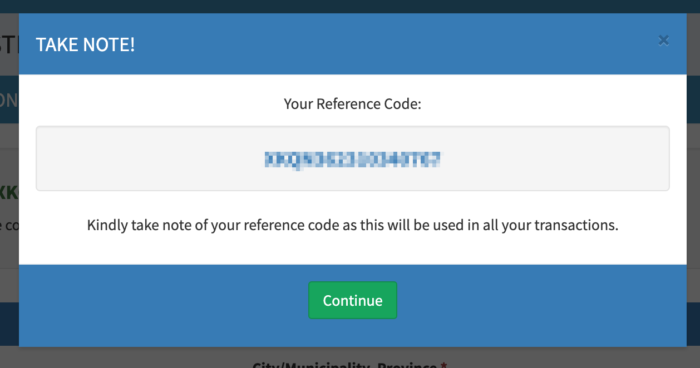
    Keep your Reference Code somewhere safe!

    Save the reference code and do not lose it! You’ll need this to pay for your business name register with DTI. What I did was copy the code and pasted it in my phone’s notes app. Do not lose your phone either! hehe.

    Close this dialog box and then click the Next button at the bottom of the page.

    “Undertaking”

    Click the Download button at the bottom of the Undertaking page. Print and sign it. I am a newbie in business stuff and I’m not sure what this is for yet, but I’ll print and sign it just in case.

    Payment

    Business name registration – online payment trouble (RESOLVED)

    The payment part made me pull my hair in frustration. I was expecting that I could pay right away via GCash like what everyone else on the Internet says. But look at the screenshot below, there’s no payment option that I could select under Online Payment!

    BNRS Payment before the recent upgrade

    The DTI Facebook page is responsive to messages, so I told them about this problem. They suggested that I pay for my business name registration over-the-counter because their GCash payment method was not working back then, and there’s no advisory on when it’s going to be back up. I felt really bad about going to a DTI teller to pay because there’s already an online option that exists, but it’s just not working! If you Google how to pay for online DTI business name registration, the web pages will tell you that it’s done through GCash.

    I could not wait for the GCash payment method to be fixed because my business name was only reserved for 5 days, according to an email from BNRS. Against my will, I decided that I’ll pay for my business name at the Government Service Express (GSE) at MOA.

    BUT!

    But on the day before my planned trip to Government Service Express at MOA, I wanted to download the Undertaking document from the BNRS so I checked the website. There was a pop-up announcing that there’s been a recent upgrade of the system. I took a peek at my pending business name registration, thinking what if I could finally select GCash to pay for it online. And it was there! I was finally able to select GCash as my payment method, and it worked. Phew! I cried tears of joy on that day.

    Payment options after the system upgrade

    DTI BNRS Payment options for your business name registration (GCash, credit card, PayMaya, or Landbank Link.Biz for online payment)

    Online payment for business registration with DTI

    You may pay for your business name registration with DTI online through the following channels:

    • GCASH
    • Visa/MasterCard/JCB
    • PAYMAYA
    • LANDBANK LINK.BIZ

    Over-the-counter payment for business registration with DTI

    You may also pay over the counter through the following:

    Transaction fees

    Payment OptionsTransaction Fee
    LANDBANK LINK.BIZ
    Landbank ATM/Visa Debit Cards₱ 15.00
    BachNet Member Bank ATM/Debit Card₱ 20.00
    Cash Payment₱ 30.00
    PESONet₱ 25.00
    GCASH
    GCash₱ 10.00
    PAYMAYA
    Online Checkout and PayMaya OneFREE 1.25% of Transaction amount
    PayMaya QRFREE 0.25% of Transaction amount
    Bills Payment via PayMaya AppFREE ₱ 8.00
    Pay by PayMayaFREE ₱ 8.00
    Smart PadalaFREE ₱ 10.00

    I chose GCash to pay for my online business registration.

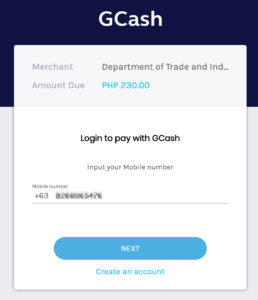
    Pay for business name registration with DTI online via GCash

    Enter your GCash number.

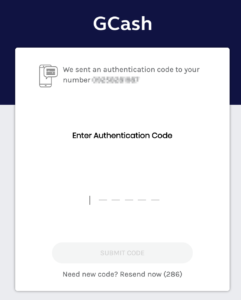
    GCash will send you an authentication code. As soon as you receive it, enter it on the website. If you don’t enter it fast enough, the system will time out and you’ll have to start all over again!

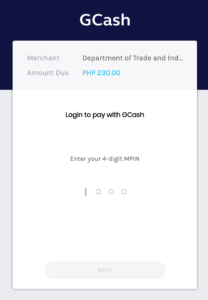
    Enter your 4-digit GCash pin then click NEXT.

    Make sure you have enough balance on your GCash! Or else, you’ll be shown the following screen:

    What to download after registering your business name with DTI online

    After successful payment, you will be able to download the following documents from the BNRS of DTI:

    • Official Receipt
    • Business Name Certificate
    • Undertaking / [Sole Proprietorship] Application Form (I got the BNR Form No. 01-2018; Also I applied for Sole Proprietorship so that’s how my application form is labeled)

    The receipt looks like this:

    Official receipt for the registered business name

    My undertaking document’s heading looks like this:

    Heading of the Undertaking / Sole Proprietorship Application Form

    Aaaand my actual business name certificate looks like this:

    Sample business name registration certificate from DTI

    Your newly registered business name should now appear in the results if you search for it in the BNRS!

    Contact DTI

    Got a problem or question? It’s best that you contact DTI directly! 🙂

    Telephone: (02) 890-1302 / 251-3670 / 251-1223
    Mobile: 0917 595-3930
    Email: [email protected]

    The BNRS Helpdesk is open from 8am to 5pm, Monday to Friday (except Holidays).

    Next step: Get Barangay Business Clearance

    The next step for us is to get a permit from the barangay. I applied for my barangay business clearance at Bangkal Barangay Hall.

  • How to get marriage certificate in the Philippines online from PSA (NSO)

    How to get marriage certificate in the Philippines online from PSA (NSO)

    I requested a copy of my PSA (formerly NSO) Marriage Certificate last Monday and received it today, on a Saturday afternoon. I was required to present 1 valid ID and submit a photocopy of it to the person who delivered my PSA Marriage Certificate.

    Online request for PSA Marriage Certificate

    On August 19, Monday, I requested a copy of my PSA Marriage Certificate online. It’s for my application for Japan visa so that’s the info I entered before clicking the “Submit” button. Then, I filled out the Marriage Details, Name of Husband, and Maiden Name of Wife. I was also asked if I had any of the following done to my marriage certificate: correction of entry, annulment, court hearings, supplemental, or legal separation… I just clicked the “None” button. And then, I had to fill out information on “Who is requesting for this Marriage Certificate?” which should match the receiver’s name in the valid ID to be presented when the marriage certificate is delivered. Upon checkout for the online ordering of my PSA Marriage Certificate, I provided my contact info, delivery address, and number of copies of the certificate. This is the point where one could add the name of authorized representatives if the owner will not be the one to receive the marriage certificate. If you are opting for this, make sure to print the LOA (Letter of Authorization).

    Payment for my PSA Marriage Certificate online order

    You may pay online using a credit card or GCash, or by bank transfer. I chose to use GCash.

    Before sending payment for my marriage certificate, the status of my order was like this:

    August 19, 2019, 10:22 am
    Status
    Waiting for Payment Confirmation from Payment Provider

    After entering my GCash mobile number, I received an SMS asking for my GCash pin for confirmation.

    Few minutes later, the status of my order was updated into the following:

    August 19, 2019, 10:28 am

    Status

    Paid via GCash

    NSO Processing

    The next day, the status of my PSA marriage certificate online order became “processing”:

    August 20, 2019, 1:34 am
    Status
    Submitted to NSO for processing

    Delivery of the PSA Marriage Certificate

    5 days after my online order, I received the following SMS at 7:34 AM:

    Good morning. Please be advised that your requested PSA (NSO) document is for delivery anytime today.  Kindly prepare the recipient’s original & photocopy of the valid ID as well as the Letter of Authorization with original & photocopy of the valid ID from the person issuing the letter (if applicable).  For inquiries, pls call PSAHelpline at 737-1111. Thank you.

    I checked the status of my order online and saw the following:

    August 23, 2019, 4:01 pm
    Status
    For Delivery

    Oooh, so it was already marked as “for delivery” since the day before!

    At 12:59PM the delivery person texted me, asking me to prepare my valid ID and a photocopy of it. I was surprised that he asked me for a photocopy too. Previously, when I requested PSA (NSO) certificates, the delivery staff didn’t even check for valid IDs sometimes. I re-read the requirements at the PSA website and found this:

    What are the necessary requirements to be presented when receiving the documents upon delivery?


    If the person receiving the document is the owner or any of the Authorized persons(legal spouse, father, mother, son or daughter), he/she should present a signed valid original ID and submit a photocopy to the courier.


    If the receiving party is not one of the authorized persons, he/she needs to present the following:


    > Original signed letter of authorization (LOA) from the certificate owner/authorized persons (legal spouse, father, mother, son, or daughter)
    > To present a valid original ID of the owner/authorized persons (legal spouse, father, mother, son, or daughter)
    > A photocopy of the valid ID of the owner/authorized persons (legal spouse, father, mother, son, or daughter)
    > A photocopy of the valid ID of the authorized representative

    Oops! My bad, I didn’t check for the changes in the rules. I’m super lucky we have a printer with photocopy function at home. Otherwise, the marriage certificate would probably be re-delivered on another day because I don’t think we have any photocopy service near our home.

    The delivery person arrived at our place around 1:45PM. He asked me to sign a document for receipt. He told me that PSA became more strict recently so they now require a photocopy of the valid ID, aside from presenting the actual ID to the courier. I was told that a lot of clients have been frustrated about this new requirement, and that one of the delivery persons was slapped by a customer before because he could not provide a photocopy of a valid ID. Ouch! But PSA really won’t allow us to receive the certificate anymore without submitting a photocopy of the ID, for data security purposes.

  • How to get Japan Visa for Philippines Passport in 2019

    How to get Japan Visa for Philippines Passport in 2019

    My husband had a scholarship in Tokyo, Japan and studied there for 2 years. For our coming wedding anniversary later this year, he wants to tour me around Tokyo! In this blog entry, I shall talk about the documents that I prepared and how I applied for a single-entry Japan Visa.

    This blog entry will only cover information about Japan visa application for people with Filipino nationality. I won’t be familiar about how foreigners in the Philippines may apply for it.

    How early can you apply for a Japan visa?

    You may apply for a Japan visa 3 months before your trip.

    When can you re-apply for Japan visa if your application got rejected?

    If a visa application is denied, applicant may only re-apply for the same purpose after (6) months.

    Reason for the denial of visa will not be disclosed even if an inquiry is made.

    How much is the Japan visa application fee?

    1200 Philippine pesos.

    Requirements to get Japan Visa for Philippines Passport in 2019

    The following are needed to get a Japan visa as a tourist:

    • Philippine Passport
    • Visa Application Form
    • ID Picture
    • Birth Certificate
    • Marriage Certificate, if married
    • Schedule of Stay in Japan

    Without Guarantor:

    You also need the following if you are shouldering your own expenses during your trip to Japan:

    • Bank Certificate
      Validity of Bank Certificate is three (3) month from the date of issue
    • Applicant’s Income Tax Return (Form 2316) clear Photocopy (latest)

    With Guarantor:

    If you have a guarantor residing in the Philippines (another person who is paying for your expenses on your Japan trip) then he/she will have to provide the following too:

    • Guarantee Letter
    • Proof of relationship between applicant and guarantor (e.g. Birth Certificates etc.)
    • Bank Certificate (original) and Income Tax Return (ITR Form 2316) (clear Photocopy) of Guarantor

    Other info on the requirements:

    • Document size for Japan visa application form should be A4
    • You are exempted from submitting birth certificate and marriage certificate if you can submit old/valid passports with used Japan visa.
    • Submission of any supporting documents not listed above is encouraged (e.g. applicant’s
      economic or social ties with the Philippines, urgent reasons for visit: medical certificate, wedding
      invitation).

    Where to apply for Japan visa

    It is required that we apply for Japan visa in accredited travel agencies. Several years ago I got my Japan visa from Reli Tours & Travel Agency in Mall of Asia.

    This time, I applied at Friendship Tours and Resorts Corporation which is located at the 3rd floor of Dusit Thani, Makati. Other travel agencies accredited for Japan visa application in Dusit Thani are UHI, and Reli Tours & Travel Agency.

    Documents that I submitted to apply for a Japan visa at Friendship Tours and Resorts Corporation

    • My valid Philippine Passport, which will expire in year 2028
    • My old, expired Philippine Passport which had a used Japan visa in 2014. The old passport’s Japan visa had my maiden name, by the way.
    • Visa Application Form, filled out completely and printed in A4 size paper
    • A 4.5×4.5cm ID Picture with white background (just tell the photographer it’s for Japan visa application and they should know how to set it up) — mine was taken 1 week before I submitted my application
    • I did not submit a Birth Certificate because I have an old passport with a used Japan visa
    • Marriage Certificate, requested a few weeks before my Japan visa application
    • Schedule of Stay in Japan
    • Guarantee Letter (I resigned from my office job and am still in the middle of setting up my own business, so I could not submit a Certificate of Employment or Income Tax Return. Even if I currently have income, I can’t submit any document to prove it. The solution was to make my husband my guarantor for the Japan tour.)
    • Proof of relationship between applicant and guarantor: this is also our Marriage Certificate
    • Original bank certificate of guarantor (His bank printed it in a Letter size paper instead of A4, but we had no problem — I was still issued a visa! I think only the application form is strictly required to be on A4 paper.)
    • Photocopy of guarantor’s Income Tax Return

    Submission of documents to Friendship Tours and Resorts Corporation in Dusit Thani, Makati

    We went to Friendship Tours and Resorts Corporation on a Saturday and arrived around 9AM. Their Saturday schedule is from 8:30AM to 12NN. The office was moderately crowded. We took a printed number for the queue at the Visa Application counters. It wasn’t a long wait since there were only about 2-3 persons ahead of us.

    When it was my turn, the staff in the counter examined my documents. She stuck a label into the page of my old passport where there’s a used Japan visa, and then bound it with my valid passport using a rubber band.

    This is what it looked like when they bound the 2 passports together — the pink label is where my used Japan visa is. (Photo taken on the day I got my passports back from the agency.)

    The staff in the counter asked for my payment, which was 1200 pesos, and then gave me a receipt in return. She told me that it will be filed by Monday, and I there should be a result 1 business week after filing. The “1 business week” is probably the maximum time because many applicants get their Japan visa earlier than that.

    Before I left, the staff also gave me a claim stub. Do not lose it!!

    I walked out of the travel agency hoping that they grant me a visa. I think that the documents I submitted were all valid, and can’t think of anything that may cause the Japan Embassy to decline my visa application.

    Japan visa was ready after 2 business days!

    I submitted my Japan visa application on a Saturday, and then on Tuesday I already got a text from the travel agency that the result is ready. That’s 1 business day after the day of filing, or 2 business days after the day applied for a visa.

    This was the content of the SMS:

    This is an Auto-Generated SMS
    Doesn’t Support Replies/Calls

    Good Day from FRIENDSHIP TOURS & RESORTS CORP. !
    Please be informed that you may now claim the passport/s filed in our office for Japanese Visa, kindly present your receipt and/or valid ID to the RELEASING COUNTER.

    FOR CLAIMING BY AUTHORIZED PERSON:
    Please BRING the following;
    1) By1st Degree Family Member:
    (Parent,Spouse, Sibling,Child)
    **1Valid ID Original & 1Xerox of the Authorized Person
    2) Relatives from 2nd degree,
    Acquaintance/Friend etc.
    Authorization letter with
    ORIGINAL specimen
    signature of passport holder.
    1 Valid ID of Authorized
    Person (Original & Xerox)
    STRICTLY *
    RESULT/S will be given upon
    claiming of the passport/s.
    &
    NO LATE CLAIMANT/S

    Schedule for Claiming:
    Mon.-Fri.
    8:30AM-5:00PM
    Sat.
    8:30AM-12:00NN
    For queries please dial;
    LAND LINE: 8109622/8938180
    Thank you.

    I couldn’t claim my passport because I got sick, so I asked my husband to claim it for me. He brought the original and photocopy of both of our valid IDs: his postal ID and my postal ID.

    Embassy of Japan granted me a visa! Yay!

    Even if I prepared my documents for the visa application meticulously, I was worried that my application might get rejected for whatever unknown reason. If it got rejected — what about the flight tickets and hotel booking that we already paid for? And places we planned to visit… 😱

    Well, I got my Japan visa!

    It looks a bit different from the Japan visa issued to me back in 2014.

    Time to review some Japanese words and writings for our trip in a couple of months. <3

  • Philippine Passport Renewal 2018 – DFA SM Manila (NCR West SM Manila Site)

    Philippine Passport Renewal 2018 – DFA SM Manila (NCR West SM Manila Site)

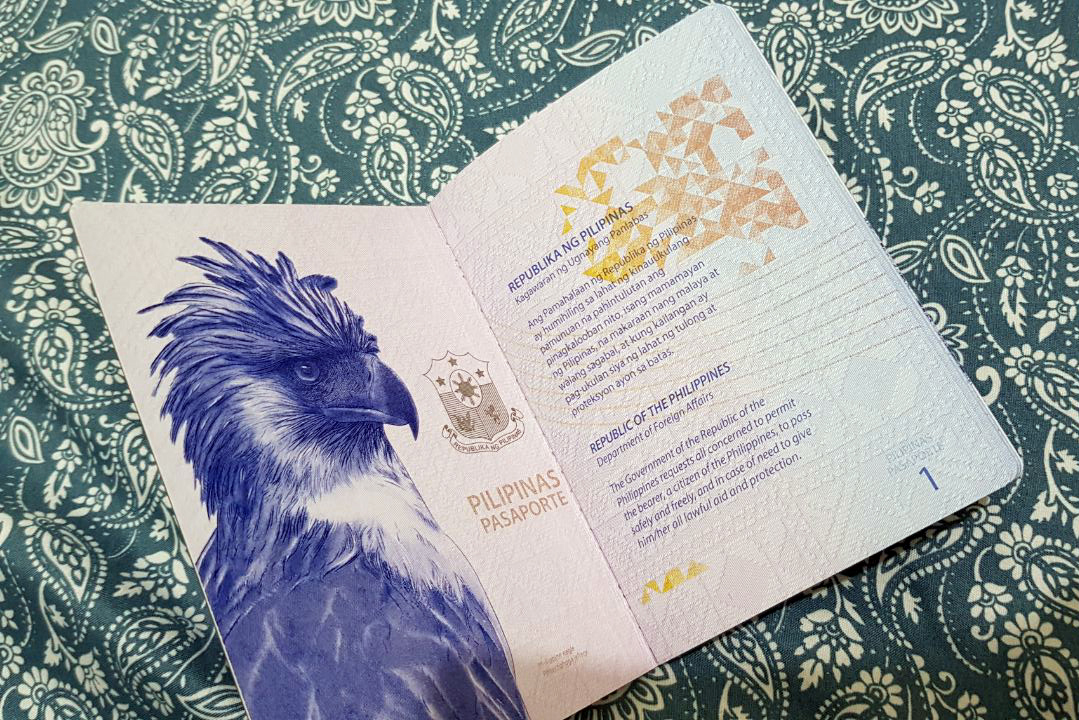
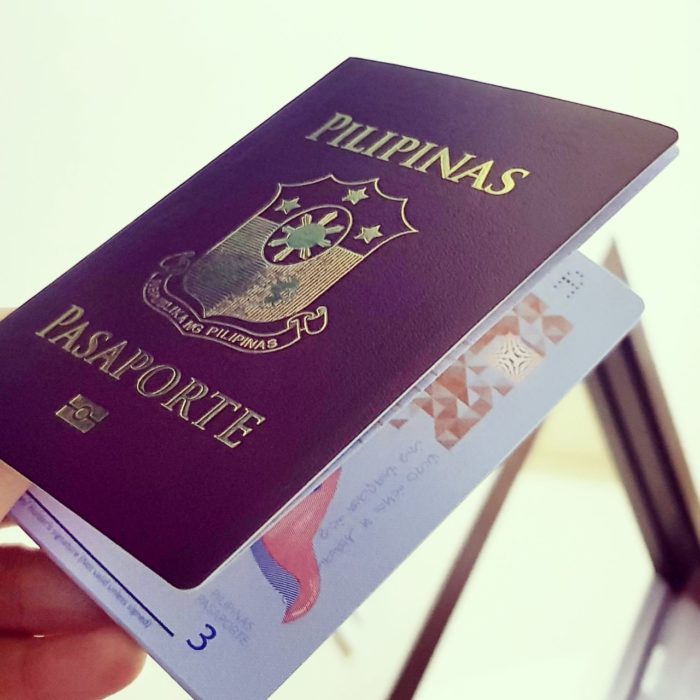
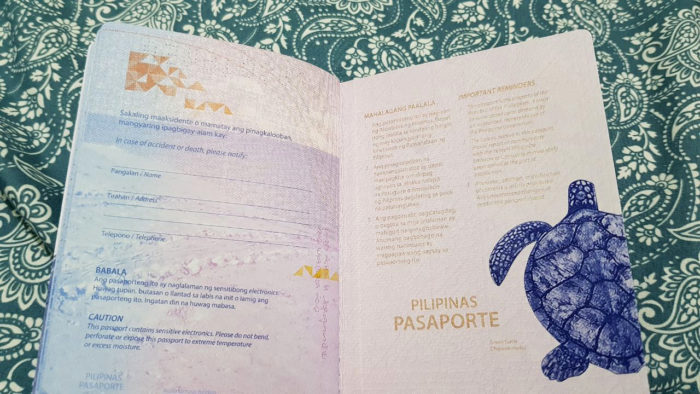
    On April 14, we had an appointment at DFA SM Manila for Philippine passport renewal. The process took 2 hours in total, which wasn’t so bad. We were holders of the older type of e-passport, which were only valid for 5 years. We received our renewed passports via LBC about 10 business days (rush) after our visit to DFA SM Manila. Our new passports are now valid for 10 years! We noticed that the valid IDs required for passport application are more difficult to acquire, compared the ones required for the older e-passport that was only valid for 5 years. This may be because there’s a spurt in the number of people applying for passport for ID purposes. Who doesn’t want an ID that is valid for 10 years? 😆

    Philippine Passport Renewal 2018

    As I write this, I think DFA still hasn’t opened slots for July 2018 onwards because of a change in the passport application/renewal procedures. Their plan is to require payment before securing an appointment for passport application/renewal. In my opinion, this is a good move from DFA because this will ensure that people who reserve an appointment slot are those who really need it. Right now, I know a lot of people who need to renew their passports for travel purposes, but cannot do so because the slots are taken by people who make money out of the schedules, or wasted by people who don’t show up on their appointment date.

    Using of phones is strictly prohibited inside DFA SM Manila. The guards called out anyone caught using their phone. There’s TV inside without audio, but kept us entertained nonetheless because the show was about pranking strangers in public ala Wow Mali!

    What was our Philippine Passport Renewal like in April 2018?

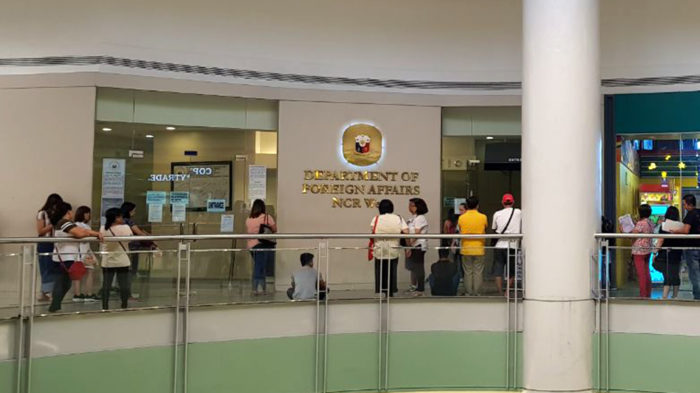
    Philippine passport renewal 2018 at DFA SM Manila

    We went through the following steps at DFA SM Manila:

    1. Verification
      There’s a reception counter where the DFA staff will verify your appointment date and time. The line here is short. When verified, they’ll let you proceed to the processing area.
    2. Processing
      Completion and validity of requirements is verified during processing. We’re e-passport holders so our only requirement was our old e-passport. FYI: to married women who would like to change from maiden name to married name, make sure to bring an original and photocopy of your PSA marriage contract and declare to the staff in the counter that you’d like to change your surname. In the application form, you should write your married name instead of maiden name.
    3. Cashier
      The line was not long at the cashier. Pay for your passport application or renewal in cash here. We paid 1200 pesos for each passport. By the way, in DFA SM Manila, you’ll be forced to pay expedite/rush fee if you go on a Saturday. Don’t worry, the early release date for expedite/rush transactions will apply. 🙂 We received the new passports in our doorstep 10 business days after visiting DFA. Otherwise, you only pay P950 for regular processing time of 15-20 business days.
    4. Encoding
      Ahh, this is the hardest part! The line was very long here. Try to bring something that will entertain you aside from a phone, since it’s strictly prohibited inside DFA SM Manila 😆 At the encoding area for Philippine passport application and renewal, they take your digital thumb marks, digital signature, and photo. Make sure you look nice in your passport photo — that will be your photo for the next 10 years! 😆 Do not wear contact lens especially colored ones. About 5 years ago I was wearing clear prescription contact lenses and the photographer said it was okay, but this days I’m not sure. Better be safe than be asked to remove them with hands you cannot wash immediately.
    5. Delivery (Optional)
      You may choose to pickup your new passport from DFA, or have it delivered to your address via LBC. That would be 150 pesos for each passport.

    Philippine Passport Renewal 2018

    How about your Philippine Passport Renewal in 2018?

    Have you just renewed your passport too? Let us know in the comments how it went! 🙂

    DFA SM Manila is also known as (NCR West SM Manila Site)