Author: Catzie

  • How to Get a PWD ID in Makati City (Plus MAC Home Visit Process)

    Getting a PWD ID in Makati City has many benefits especially if one has expensive maintenance meds to buy regularly. But navigating local government processes adds to the burdens as PWDs. If you live in Makati and need to apply for a Person With Disability (PWD) card, this guide covers things you need to know — including details from an actual home visit experience from the Makati Action Center (MAC).

    I’ll do my best to share exact step-by-step processes, the updated requirements, and a handy tool to help you calculate your discounts once your PWD ID arrives. Note: my source, Renato, got theirs from Bangkal’s Makati Action Center.

    📋 Requirements for a Makati PWD ID

    • Six (6) copies 1×1 ID Picture
    • Latest COMELEC Certification (for minors, Voter’s Certificate of parent/guardian is required)
    • Barangay Certification
    • Duly accomplished PWD Profile Sheet
    • Medical Certificate with classification of disability and duration of the validity of the ID (recent) or Certification on Disability signed by the Brgy. Health Center Doctor with duration/validity of the ID.

    🚶‍♂️ Step-by-Step Application Process

    1. Obtain the Application Form and PWD Profile Sheet from the Persons with Disability Affairs Office (PDAO);
    2. Fill out the Application Form and PWD Profile Sheet accurately and completely;
    3. Affix one (1) ID picture on the accomplished Application Form and staple the other ID pictures with the PWD Registration Form (PWD-RF);
    4. Attach a copy of the required documents to confirm the medical/disability condition/s of the applicant;
    5. Submit the accomplished PWD-RF and all the requirements to the MSWDPDAO;
    6. Claim PWD ID, Purchase Booklet and Movie Booklet after three (3) working days from the date of submission.

    Extra step for PWD ID Application – Barangay Health Center (Experienced in Bangkal, Makati City)

    My source followed up with additional info based on their experience in getting a PWD ID from Barangay Bangkal, Makati City:

    1. If applicable: Bring medical certificate from your doctor, stating that you are eligible for a PWD ID (Note: Not sure if anyone was already able to acquire a med cert directly from the barangay’s doctor, without a pre-requisite med cert from their personal doctor. Let me know your experiences, too, guys!)
    2. Get medical certificate from Barangay Health Center’s doctor to certify that you are eligible for a PWD ID (It’s like showing a pre-requisite med cert in order to acquire a version that is officially recorgnized in the Barangay Hall.)
    3. Submit that medical certificate along with other requirements

    To quote my source:

    “Sa naalala ko, we went to MAC first and they advised us kumuha ng medical certificate from the Barangay Health Center [in Bangkal]. Dun namin binigay med cert from psychiatrist and they gave us a med cert from the barangay’s doctor after a few days [and submitted that during application for PWD ID in Makati.]“

    It sounded like there were several back-and-forths during their PWD ID application process.

    The MAC Home Visit and Delivery (Renato’s Experience)

    Unlike many other cities, Makati requires a home visit as part of the requirements to acquire a PWD ID.

    According to Renato, a Makati resident who applied for PWD ID in the year 2022, the home visit was like this (Pasting their write-up that they were supposed to share in their own blog, but never got to, which they attribute to their ADHD. lol. )

    “Today, Kuya Jun from Makati City Hall / Makati Action Center visited my home as part of the process to apply for a PWD ID.

    It was an anxiety-inducing wait since it’s a “surprise visit” that may happen any time within 2 weeks after PWD ID application. This was to verify that I am really a resident of the address I provided during my application. My disability’s symptom is mostly executive dysfunction from ADHD, which requires that I plan every single activity in my day, otherwise I won’t be able to accomplish most of my responsibilities.

    It was a good timing that Kuya Jun arrived before my day started so I don’t have to stop what I’m doing.

    He asked me to fill out a form. I wonder why they make me fill out so many forms. I already filled out a similar form during my application on July 1, 2022.

    PWD ID will be delivered in 1-2 weeks from now. It’s a bit frustrating because at Makati Action Center, I was told that I should receive my PWD ID 2 weeks after application. This week is already the second week after application, and now I have to wait another week or two?

    I told Kuya Jun about my concern and he asked if I already need the PWD ID ASAP. I said yes, because I need it to buy medications in discounted price. He put my mind at ease by telling me that the 1-2 weeks estimate has a buffer, and it’s possible to get the PWD ID in less than 1 week. He also said that he’ll try to expedite the processing of my application with Makati City Hall so that I receive my PWD ID soon.

    Some things don’t sink in fully in my mind unless I hold an object that proves that something happened. I’ve been diagnosed with ADHD Inattentive-Type decades after suffering from its symptoms in the dark, and it’s a life-changing event. So all the struggles I go through while doing simple things that other people seem to accomplish without much effort, were caused by a mental, congenital disability? Owning a PWD ID, as well as the new experiences (like weird looks I may get from other customers as I’m not on a wheelchair) that I’ll gain while using it in establishments, will help everything sink in. Once everything fully sinks in, I’ll be more able to plan what I want to do in life around my disability.”

    – Renato (a Makati resident), 2022

    📱 Maximize Your New ID: Free PWD / Senior Citizen Discount Calculator (for Android devices)

    Being a member of a family with several senior citizens, I regularly transact with establishments using senior citizen discount IDs. So, a few years ago, I developed a free Android app that calculates the expected discount for transactions that used a Senior Citizen ID or a PWD ID card for availing discounts.

    Once your Makati PWD ID arrives, calculating your 20% discount and VAT exemption at restaurants and pharmacies can be confusing.

    Make your life a little easier as/with a PWD or Senior Citizen. Download my free app on Google Play:

    Senior/PWD Discount Calculator (For Android)

    Why it’s helpful:

    • Instant Math: Computes your exact payable amount instantly, factoring in VAT exemption.
    • No arguments: Shows you the exact math so you know you are billed correctly at fast-food chains and drugstores.
    • Free: No money need be shelled out here. Life’s already expensive for PWDs and senior citizens.
    • Tried and tested: Me and my family have personally tried and got accurate discount computations from this app.

    [Download the PWD Discount Calculator here]

    I can almost hear complaints for IPhone users as they read the “for android” bit. Hehe. Maybe one of these days I could try to make at least a web-based version, if not an IOS app one? We’ll see.

    💡 Final Tips for getting a PWD ID for Makati Residents

    Applying for a PWD ID locally through your Barangay MAC can save you a trip to Makati City Hall. Make sure your contact details on the form are accurate so the MAC personnel can easily find your home for the home visit! Best of luck to you or to your loved ones who wish to apply for a PWD ID in Makati~ Remember, only real PWDs should apply for PWD IDs. Fake PWDs, scram!!
  • Attempting to keep blog traffic afloat in the AI Era

    I’ve been so “heads down” at my Android App Dev job in the past few years that I didn’t know what’s going on in the SEO scene anymore.

    Today I learned that SEO is not all there is anymore. Well, I knew something was off because my blog traffic dropped significantly in the past couple of years, in time with the introduction of AI Overview when one searches for something on Google. GEO (Generative Engine Optimization) is a specific concept I learned about today. The way I understand it, it’s optimizing your web pages not for search engine, but for AI (the “generative engine”).

    I picked 1 popular (relatively) blog post and optimized its structure for GEO:

    • Added an <h2> tag “Quick Guide Summary” to a popular post
    • Converted the entire WordPress post content into “block” format (it’s a very old blog post!)
    • Converted list items that were only pieced together by asterisks (*) preceding each line, into semantic HTML lists
    • Wrapped important texts in <strong> tags, optimizing them for both human and AI readers
    • Added a FAQ at the bottom of the post to help AI find answers easier on my blog post
    • Added publish and last update dates to each blog post

    Non-GEO specific: Added navigation “helpers” to the loooong blog post, such as jump-to-top and jump-to-section links/buttons.

    Not sure yet how this will affect the blog post. I’m still re-learning the ropes here. GEO, huh? Interesting..

  • Freshened up this site…

    In response to the recent PHP vulnerability issue, I spent some time here in this blog site to upgrade my WordPress theme, plugins, WordPress installation itself, and finally, the PHP version.

    One minor issue was encountered after upgrading plugins — Head, Footer and Page Injection plugin began showing parts of some code that I inserted, as plain text in my blog site!! I noticed that the plugin had a notice stating that “php is not allowed in your code (disabled by your theme or a plugin)”. The fix that worked was to head over to the plugin’s settings page (Settings -> Head and Footer) and then go to the ‘Advanced’ tab, and then toggle on the setting labeled as “Enable PHP execution”.

    The PHP version I was using was quite outdated T_T and so upgrading to version 8.0 broke my blog site with the error “there has been a critical error on this website.” Fortunately, the thing that I deactivated first was the exact cause of error: my old, outdated theme! It was “Sparkling” theme, which I hadn’t touched for years. I changed into the Twenty Twenty-Five theme for a fresh look and updated WP code. Thank you, Colorlib for the Sparkling theme — it served me well for several years!

    I feel good after taking the time to update this site. I’ve had this for over a decade now.

  • Installing git on a macbook

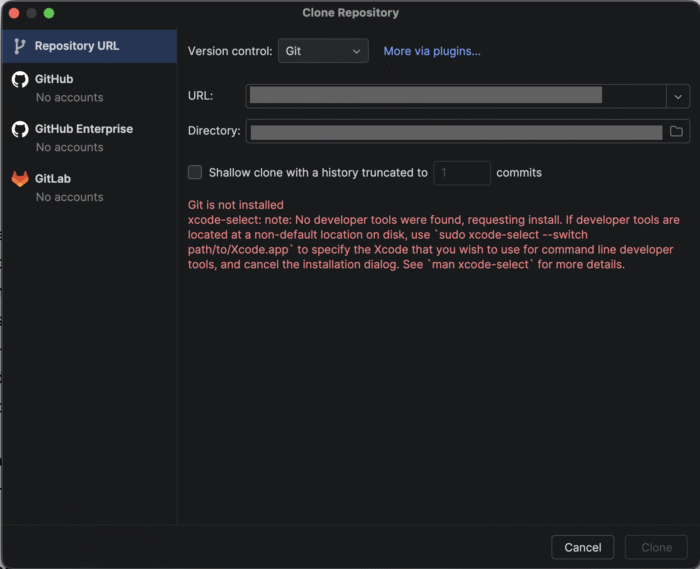
    As I was setting up a new Android Studio installation in a reformatted Macbook, I ran into this issue:
    Git is not installed
    xcode-select: note: No developer tools were found, requesting install. If developer tools are located at a non-default location on disk, use sudo xcode-select --switch path/to/Xcode.app to specify the Xcode that you wish to use for command line developer tools, and cancel the installation dialog. See man xcode-select for more details.

    <!–more–>

    To verify the lack of git in the machine, I ran git --version command for which I got a xcode-select: note: No developer tools were found, requesting install.

    To install git, I ran the following command in my Terminal:
    xcode-select --install

    and got a response:
    xcode-select: note: install requested for command line developer tools

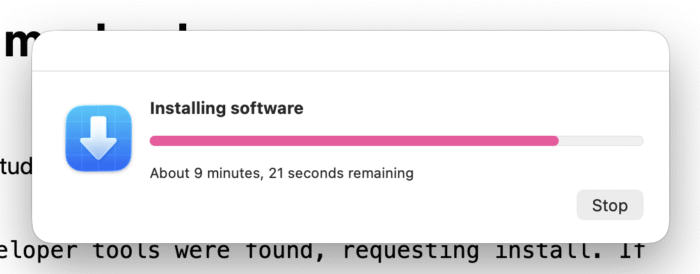
    I initially thought that the git installation wasn’t working, until I finally noticed that there was a pop-up asking for confirmation! I confirmed the installation and right now the pop-up window looks like this as it installs git on my machine.

    As I waited for the installation to complete I asked myself why I write about this. Will it be helpful to anyone? Will anyone even read this page in the future, at the age when AI is most people’s first source of information instead of visiting web pages one by one?

    The answer I had was: Yes, this will surely be helpful to at least one person — me! The reason why I blog about challenges I encounter to begin with (since over a decade ago) is to help myself remember in the future. But, why? It’s because it supports my terrible memory.

    After a few minutes, “the software was installed”:

    I ran git --version again and finally got this:
    git version 2.50.1 (Apple Git-155)

  • Spoofing Battery and Forcing Sleep (Android Development)

    I wanted to do something with my Android phone using ADB commands, while keeping it plugged in to run the said commands. However, the thing I wanted to test was related to the idle (dozing or asleep) mode of Android devices. The workaround was to spoof the battery state to bypass Android’s charging restrictions.

    Spoofing Battery Charging Status and Forcing Android Device to Sleep (Idle Mode)

    • Turn off the device screen using the physical power button.
    • Trick Android into thinking the device is running on battery power: adb shell dumpsys battery unplug
    • Force the device to step into deep Doze mode: adb shell dumpsys deviceidle force-idle
    • Verify the device is successfully spoofed and asleep: adb shell dumpsys deviceidle get deep (This should return IDLE).

    Can also do:
    adb shell dumpsys battery unplug && adb shell dumpsys deviceidle force-idle && adb shell dumpsys deviceidle get deep

    Device Cleanup for Spoofed Battery and Forced Sleep (Crucial!)

    1. Once testing is done, you must tell the OS to start reading the actual battery state again, otherwise it won’t charge properly: adb shell dumpsys battery reset
    2. Bring the device out of idle: adb shell dumpsys deviceidle unforce

    Can also do:
    adb shell dumpsys battery reset && adb shell dumpsys deviceidle unforce && adb shell dumpsys deviceidle get deep

  • Shorter ADB commands for Android Studio Emulator Device targeting

    To target my specific emulator devices on Android Studio with my ADB (Android Debug Bridge) commands, I usually need to type long ones, like in the commands below where i wanna list the contents of a directory:

    adb -s emulator-5554 ls /sdcard/Android/sub/directory/
    adb -s emulator-5556 ls /sdcard/Android/sub/directory/

    When I am working on a new feature or a bug-fix ticket, I try to avoid typing long commands and args over and over again, especially args that are as error-prone as emulator-5554.

    How to shorten the ADB commands that target emulators (Mac OS):

    Open your Zsh config file with an editor. Mine by habit is Vim. Like so:
    vim ~/.zshrc

    Use your arrow keys to go to the very bottom of the file and copy-paste below exact code:

    adbs() {
      port=$1
      shift
      adb -s "emulator-55$port" "$@"
    }


    What it does is creates a new command adbs. I think the addition of s at the end is appropriate because the flag we are trying to work with is the -s flag which stands for “Serial”, for identifying specific emulators.

    The way the new command works is,

    • the $1 captures the first argument you type after adbs and saves it — for example, the 54 in adbs 54.
    • The shift bit removes the first argument from the front so that the actual command to be run will NOT be adb -s "emulator-5554" 54 logcat (wrong!)
    • Finally, the last line adb -s "emulator-55$port" "$@" runs the correct command, inserting the first argument (54 in our example) where $port is, followed by "$@" which grabs the rest of the command after the 54

    Save the changes to the config file and then exit the editor. In Vim I press Esc key, then type :wq! and hit Enter. IIRC my partner questions something about my :wq! usage, but what he points out, I can’t remember.

    After saving the config file, run the following command to make the new shortcut work immediately:

    source ~/.zshrc

    Usage Example:

    Instead of typing the long version:
    adb -s emulator-5554 ls /sdcard/Android/sub/directory/

    We can just type:
    adb -s 54 ls /sdcard/Android/sub/directory/

    Extra: to know what serial numbers of running devices you got, run below command

    adb devices

    Random thoughts: I am grateful to my very first team lead as a software developer (Peng) because he’s the one who inspired me to become comfortable with command line interfaces. Remembering how much I grew as a dev in that team due to high-traffic production databases that we were managing and debugging in realtime. Oh, the source command on the other hand, was something I learned from my current team lead, Maru. I like how much I am growing in this current team, not only as a dev, but also as a person.

    Credit goes to Google Gemini for the above adbs custom command. I had no idea how to write that until today. hehe

  • A random dev brain dump

    I don’t need a reason to randomly post a brain dump on my blog, no?

    • If an Android dev wishes to implement a precise “notification ID” that they want to be able to precisely cancel later (imagine that it plays an annoying alarm tone!) they can go about it either by
      • Using a unique ID tied to that notification’s base entity (e.g., an app’s incoming message) so that NOTIFS WILL STACK, or
      • Using a unique, dedicated ID that is defined as a constant and is defined without ties to the notification’s base entity so that ONLY THE LAST NOTIF WILL BE SHOWN
    • I gotta update my site’s, something..
    • If an Android dev’s soft keyboard covers a text input field when it’s displayed, particularly in Android 15 devices, they may wanna try to add an imePadding modifier to the root element (e.g., Box, Column) because this modifier will take care of spacings whenever the keyboard appears, avoiding issues such as covering the text input field.