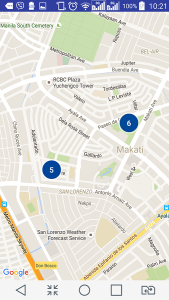
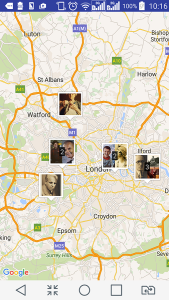
//Update: I prepared a simple Android app that features a Google Map with markers that form clusters together when zoomed out. Check it out: Simple Android Map Clustering on GitHub.
This “dev note” of mine will give you a rough idea on how to add a Google Map to your Android up from an empty activity, not from a pre-made Google Maps activity.
I won’t be able to write everything in detail here because I’m in a hurry, and so I’m calling this article a “dev note” instead of tutorial. 🙂 This dev note can be considered a “guide” too.
This dev note was based on Android Studio v.2.1 running on MAC OS X
From your Android Studio’s SDK Manager, install Google Play Services.
Add this as child of
<application> tag in AndroidManifest.xml:
|
|
<meta–data android:name=“com.google.android.geo.API_KEY” android:value=“YOUR_API_KEY”/> |
Later we’ll replace YOUR_API_KEY with a key from Google API Console.
Also add these to your AndroidManifest.xml as direct child of manifest tag:
|
|
<permission android:name=“com.yourdomain.projname.permission.MAPS_RECEIVE” android:protectionLevel=“signature” /> <uses–permission android:name=“android.permission.ACCESS_FINE_LOCATION” /> |
We need to get an API KEY for the value attribute of this meta data. Let’s get one from the Google API Console — create a new project there and then search for Google Maps Android API. Enable it.
After enabling it, you’ll find a way to get an API key that we need from Google API Console. Go to Credentials -> Create Credentials -> API Key -> Android Key. Before we are given the API key, we need to provide Google API Console a SHA1 certificate fingerprint from our computer and our app’s package name.
To generate SHA1 certificate fingerprint on a Mac, type this on the terminal:
|
|
keytool –exportcert –alias androiddebugkey –keystore ~/.android/debug.keystore –list –v |
On Windows, try this command:
|
|
keytool –list –v –keystore “%USERPROFILE%\.android\debug.keystore” –alias androiddebugkey –storepass android –keypass android |
When prompted for a keystore password, enter the word debug as your password.
Copy the SHA1 certificate fingerprint and then paste it into Google API Console. Enter your package name as well (e.g. com.yourdomain.projname). You’ll be given an API Key in return.
Note: My Android Studio says ‘In the Google Developer Console (https://console.developers.google.com), ensure that the “Google Maps Android API v2” is enabled.’ but I can’t find the option for V2.
Remember the meta-data tag we added in the AndroidManifest.xml? Replace the value with the API key that you just copied from Google API Console.
Resource: https://developers.google.com/maps/documentation/android-api/signup
Open app/build.gradle file and add the following as dependency:
|
|
compile ‘com.google.android.gms:play-services-maps:8.4.0’ |
Sync your project with Gradle files.
This was one of the tutorials I followed: GOOGLE MAPS ANDROID API V2 TUTORIAL USING ANDROID STUDIO and I based my XML plus Java codes on the author’s.
My files in the end…
Here were the codes of my Android app when I finally made the Google Map show up in the activity:
app/build.gradle
1 2 3 4 5 6 7 8 9 10 11 12 13 14 15 16 17 18 19 20 21 22 23 24 25 26 |
apply plugin: ‘com.android.application’ android { compileSdkVersion 23 buildToolsVersion “23.0.3” defaultConfig { applicationId “net.catzie.maptest” minSdkVersion 16 targetSdkVersion 23 versionCode 1 versionName “1.0” } buildTypes { release { minifyEnabled false proguardFiles getDefaultProguardFile(‘proguard-android.txt’), ‘proguard-rules.pro’ } } } dependencies { compile fileTree(dir: ‘libs’, include: [‘*.jar’]) testCompile ‘junit:junit:4.12’ compile ‘com.android.support:appcompat-v7:23.3.0’ compile ‘com.google.android.gms:play-services-maps:8.4.0’ } |
build.gradle
1 2 3 4 5 6 7 8 9 10 11 12 13 14 15 16 17 18 19 20 21 22 23 |
// Top-level build file where you can add configuration options common to all sub-projects/modules. buildscript { repositories { jcenter() } dependencies { classpath ‘com.android.tools.build:gradle:2.1.0’ // NOTE: Do not place your application dependencies here; they belong // in the individual module build.gradle files } } allprojects { repositories{ jcenter() } } task clean(type: Delete) { delete rootProject.buildDir } |
app/src/main/res/layout/activity_main.xml
1 2 3 4 5 6 7 8 9 10 11 12 13 14 15 16 17 18 19 20 |
<?xml version=“1.0” encoding=“utf-8”?> <RelativeLayout xmlns:android=“http://schemas.android.com/apk/res/android” xmlns:tools=“http://schemas.android.com/tools” android:layout_width=“match_parent” android:layout_height=“match_parent” android:paddingLeft=“@dimen/activity_horizontal_margin” android:paddingRight=“@dimen/activity_horizontal_margin” android:paddingTop=“@dimen/activity_vertical_margin” android:paddingBottom=“@dimen/activity_vertical_margin” tools:context=“.MainActivity”> <fragment xmlns:android=“http://schemas.android.com/apk/res/android” xmlns:map=“http://schemas.android.com/apk/res-auto” xmlns:tools=“http://schemas.android.com/tools” android:id=“@+id/map” android:name=“com.google.android.gms.maps.SupportMapFragment” android:layout_width=“match_parent” android:layout_height=“match_parent” tools:context=“net.catzie.maptestpremade.MapsActivity” class=“com.google.android.gms.maps.MapFragment” /> </RelativeLayout> |
app/src/main/java/net/catzie/maptest/MainActivity.java
1 2 3 4 5 6 7 8 9 10 11 12 13 14 15 16 17 18 19 20 21 22 23 24 25 26 27 28 29 30 31 32 33 |
package net.catzie.maptest; import android.os.Bundle; import android.support.v7.app.AppCompatActivity; import com.google.android.gms.maps.CameraUpdateFactory; import com.google.android.gms.maps.GoogleMap; import com.google.android.gms.maps.MapFragment; import com.google.android.gms.maps.model.LatLng; import com.google.android.gms.maps.model.Marker; import com.google.android.gms.maps.model.MarkerOptions; public class MainActivity extends AppCompatActivity { private static final LatLng GREENBELT1 = new LatLng(14.553048, 121.020030); private GoogleMap map; @Override protected void onCreate(Bundle savedInstanceState) { super.onCreate(savedInstanceState); setContentView(R.layout.activity_main); map = ((MapFragment) getFragmentManager().findFragmentById(R.id.map)).getMap(); Marker davao = map.addMarker(new MarkerOptions().position(GREENBELT1).title(“Greenbelt 1”).snippet(“San Lorenzo, Makati”)); // zoom in the camera to Greenbelt 1 map.moveCamera(CameraUpdateFactory.newLatLngZoom(GREENBELT1, 15)); // animate the zoom process map.animateCamera(CameraUpdateFactory.zoomTo(15), 2000, null); } } |
app/src/main/AndroidManifest.xml
1 2 3 4 5 6 7 8 9 10 11 12 13 14 15 16 17 18 19 20 21 22 23 24 25 26 27 28 29 30 31 32 |
<?xml version=“1.0” encoding=“utf-8”?> <manifest xmlns:android=“http://schemas.android.com/apk/res/android” package=“net.catzie.maptest” > <application android:allowBackup=“true” android:icon=“@mipmap/ic_launcher” android:label=“@string/app_name” android:supportsRtl=“true” android:theme=“@style/AppTheme” > <activity android:name=“.MainActivity” > <intent–filter> <action android:name=“android.intent.action.MAIN” /> <category android:name=“android.intent.category.LAUNCHER” /> </intent–filter> </activity> <meta–data android:name=“com.google.android.geo.API_KEY” android:value=“YOUR_OWN_API_KEY”/> </application> <permission android:name=“net.catzie.maptest.permission.MAPS_RECEIVE” android:protectionLevel=“signature” /> </manifest> |
…even though the Google Map now shows up on my Android activity, I get these errors that I’m not able to fix yet:
|
|
05–27 12:12:39.251 20805–20805/net.catzie.maptest E/MPlugin: Unsupported class: com.mediatek.common.telephony.IOnlyOwnerSimSupport 05–27 12:12:40.073 20805–21000/net.catzie.maptest E/[DRVB][EXT][UTIL]: disp_only_chk: DRVB CHECK DISP PROCESS DONE ! (2/0x47/0x48/0x46) 05–27 12:12:40.074 20805–21000/net.catzie.maptest E/[DRVB][EXT][UTIL]: disp_only_chk: DRVB CHECK DISP PROCESS DONE ! (720/1280/1) 05–27 12:12:40.122 20805–20960/net.catzie.maptest E/NativeCrypto: ssl=0xb8465640 cert_verify_callback x509_store_ctx=0x9f5774c8 arg=0x0 05–27 12:12:40.122 20805–20960/net.catzie.maptest E/NativeCrypto: ssl=0xb8465640 cert_verify_callback calling verifyCertificateChain authMethod=ECDHE_ECDSA 05–27 12:12:40.422 20805–21000/net.catzie.maptest E/libEGL: cache file failed CRC check 05–27 12:12:41.791 20805–20991/net.catzie.maptest E/DynamiteModule: Failed to load module descriptor class: Didn‘t find class “com.google.android.gms.dynamite.descriptors.com.google.android.gms.googlecertificates.ModuleDescriptor” on path: DexPathList[[zip file “/data/app/net.catzie.maptest-2/base.apk”],nativeLibraryDirectories=[/vendor/lib, /system/lib]] 05–27 12:12:42.355 20805–20959/net.catzie.maptest E/NativeCrypto: ssl=0xb86ce8b8 cert_verify_callback x509_store_ctx=0x9f6804f8 arg=0x0 05–27 12:12:42.355 20805–20959/net.catzie.maptest E/NativeCrypto: ssl=0xb86ce8b8 cert_verify_callback calling verifyCertificateChain authMethod=ECDHE_ECDSA |