Tag: Android

  • Add “options menu” to an AppCompatActivity (Android App Development)


    Adding an “options menu” to an Android app’s Activity is quite simple.

    This is an example of what an Android options menu looks like. Look at the icon that looks like 3 dots vertically stacked.
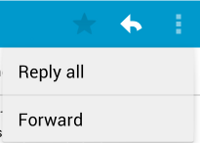
    android options menu

    My dev environment status as of writing this

    Android Studio version: v. 2.1
    OS: Mac OS X El Capitan v. 10.11
    My Android app build status:

    • compileSdkVersion: 24
    • buildToolsVersion: 24.0.2
    • minSdkVersion: 16
    • targetSdkVersion: 24

    Add “options menu” to an Android AppCompatActivity

    #1 Create menu layout file

    Create res/menu/main.xml, creating the menu folder if not yet existing.

    Add the following to res/menu/main.xml:

    #2 Enable menu by adding MenuInflater to the Activity

    Add the following overriding method to your AppCompatActivity:

    #3 Add listener for selected options menu item

    Again, add the following overriding method to your AppCompatActivity. Replace the Toasts with whatever you need to do upon menu item selection:

    That’s it! Your Android Activity should now have an options menu on the actionbar
    My resources for adding my options menu to Activity

    Adding the App Bar
    Android SDK: Implement an Options Menu

  • Java: method to convert degrees into directions (16-wind compass rose)

    I’m working on a weather app for Android. The data for wind direction that I get from the weather API is in form of degrees (0 to 360). I want to display wind direction in a user-friendly format such as N (North), NNE (North-northeast), NE (Northeast), ENE (East-Northeast), E (East), ESE (East-Southeast), SE (Southeast), SSE (South-Southeast), S (South), SSW (South-Southwest), SW (Southwest), WSW (West-Southwest), W (West), WNW (West-Northwest), NW (Northwest), and NNW (North-Northwest). I think this is more user-friendly, at least when compared to degrees format.

    16-wind compass rose
    The eight half-winds are the points obtained by bisecting the angles between the principal winds. The half-winds are north-northeast (NNE), east-northeast (ENE), east-southeast (ESE), south-southeast (SSE), south-southwest (SSW), west-southwest (WSW), west-northwest (WNW) and north-northwest (NNW). Notice that the name is constructed simply by combining the names of the principal winds to either side, with the cardinal wind coming first, the ordinal wind second. The eight principal winds and the eight half-winds together yield a 16-wind compass rose, with each compass point at a 22 1⁄2° angle from the next.

    Points of the Compass

    And here is the Java method that I prepared so I can convert direction data from degrees into directions (16-wind compass rose):

  • Android Maps: Get current location coordinates with Google API Client Builder

    To get your current location via Google Map in an Android app, this was how we do it:

    Stop. Don’t use that! The method GoogleMap.getMyLocation() is deprecated. Instead, we need to use FusedLocationApi and the callback onLocationChanged().

    Here’s an example code that works for me ( consider copying the contents of onResume() into onStart() ):

    Code source: How to get current location of device on google maps api v2, getMyLocation() method is deprecated

  • Android Studio and the 64K methods limit (DEX error)

    Hi! I’ll share a few tips with you on how to find out the number of methods that your Android app has. I’m gonna show you a few tools such as APK file methods counter, and an Android plugin that will show you the number of methods each imported class or dependency has. These will help you figure out if you’re nearing the 64K methods limit, and determine which classes/dependencies must be causing it.

    First off, try this online drag-and-drop tool that will show you the total method count as well as breakdown based on the APK file you’ll use: APK Method Count

    Now, let’s install the plugin. After installation, you should be able to see method counts on your app/build.gradle file.

    Install plugin to check for unused dependencies: Jonnyzzz Dependencies. I used version 1.0.10. To do this, in [Windows] go to File -> Plugins, or in [Mac] go to Android Studio -> Preferences. Press “Browse Repositories” then find and install Jonnyzzz Dependencies. Restart Android Studio.

    To use, from the menu, select Tools -> Unused Module Dependencies -> Analyse All Modules

    You’ll be prompted for an option to remove all unused dependencies. I could not do that because I had a team mate who might use some of those in the list, so I manually deleted libraries that I’m sure we no longer need.

    Sync Gradle, Clean, or even Rebuild… and run your app again.

    I must admit that this DEX file error is a nightmare to me. xD I used to only code my Android app in a Windows 7 computer, which was very slow. Then some office friends decided to lend me a higher-specs Mac Mini that nobody’s using. It’s helping a lot, but the app I’m working on in Windows is getting 64K methods limit in Mac. I had the exact same copy of my Android Studio project in both Windows and Mac computers, but only the one in Mac was getting 64K methods limit error. 😆

    Now I’m thinking of the small differences in my Windows’ and Mac’s config for Android Studio…

    Could it be because ‘com.google.gms:google-services:2.0.0-alpha9’ and Android Studio v.2.1 in Mac, while my Windows 7 had ‘com.google.gms:google-services:2.0.0-alpha6’ and Android Studio v.1.4?

    From what I understand in the Methods Count pages for Google Services 2.0.0 Alpha 6 and Alpha 9, Alpha 6 has more methods than Alpha 9.

    My Android Studio v.1.4 in Windows using Alpha 6 (more methods) but the app runs without problem, while Android Studio 2.1 in Mac using Alpha 9 (less methods) triggers the 64K methods limit. 😆

    I don’t want to keep thinking about this right now because I have pending tasks to do. 😆 But it’s nice to know roughly what we can do next time I get this dreaded 64K methods limit error.

  • Android ImageView has unwanted padding: layout troubleshooting


    If you use ImageView in your android app layout and you get that unwanted padding around the image, here’s an Android XML attribute that helped me solved the layout issue:

    Add android:adjustViewBounds="true" attribute to your ImageView XML tag and you’ll probably see the unwanted padding go away.

    According to the ImageView docs:

    android:adjustViewBounds

    Set this to true if you want the ImageView to adjust its bounds to preserve the aspect ratio of its drawable.

    You might also want to check the related Java method: setAdjustViewBounds(boolean)

  • Android app dev: image sizes for variety of screen sizes

    As a mobile app developer, we need to consider various screen sizes for a wide range of Android devices.

    Here’s a quick note of recommended image sizes for Android app icons:

    36×36 for low-density (LDPI)
    48×48 for medium-density (MDPI)
    72×72 for high-density (HDPI)
    96×96 for extra high-density (XHDPI)
    180×180 for extra extra high-density (XXHDPI)
    192×192 for extra extra extra highv-density (XXXHDPI)

    Image Scaling

    Source: Units and measurements – Layout – Google design guidelines

    Images can be scaled to look the same across different screen resolutions by using these ratios:

    Screen resolution dpi Pixel ratio Image size (pixels)
    xxxhdpi 640 4.0 400 x 400
    xxhdpi 480 3.0 300 x 300
    xhdpi 320 2.0 200 x 200
    hdpi 240 1.5 150 x 150
    mdpi 160 1.0 100 x 100

    For our reference. 🙂

    You may read more about Supporting Multiple Devices.

    I also want to share MakeAppIcon. Use that online tool to quickly generate resized images for various Android screen sizes for you.

  • Android: 2-dimensional List String (List of List)

    For a web developer who used mostly PHP and JavaScript for several years, plunging into Java can be challenging especially when it comes to data types.

    PHP and JavaScript are loosely typed languages, while Java is strict about types.

    I was told that in Android, List<String> is very commonly used, even more than arrays. And now I’ve come to the point when I need to use a 2-dimensional List<String>.

    Here’s a sample code:

    Output of System.outprintln(Arrays.deepToString(ls.toArray())); is this:

    The output of Log.d("serialized", listOfList.toString()); is this:

  • Android confirm dialog box with OK and Cancel button

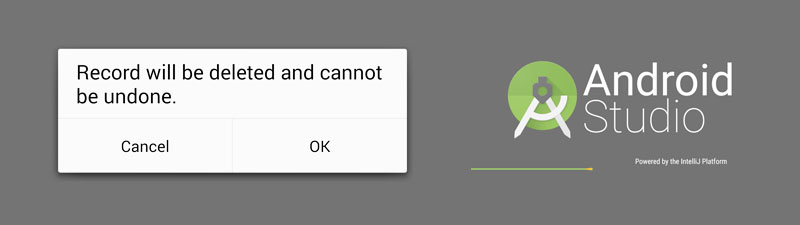
    Android confirm dialog box with OK and Cancel button

    This will probably be one of the Android code snippets that I will need to go back to from time to time.

    I’m sharing the codes we need to show an Android confirm dialog to prompt the user to click “yes” or “no”, or in my case, “OK” or “Cancel”.

    The following code for Android confirm dialog is in my MainActivity.java file:

    (more…)

  • Android Studio dark theme (change into Darcula theme)

    Android Studio dark theme (change into Darcula theme)

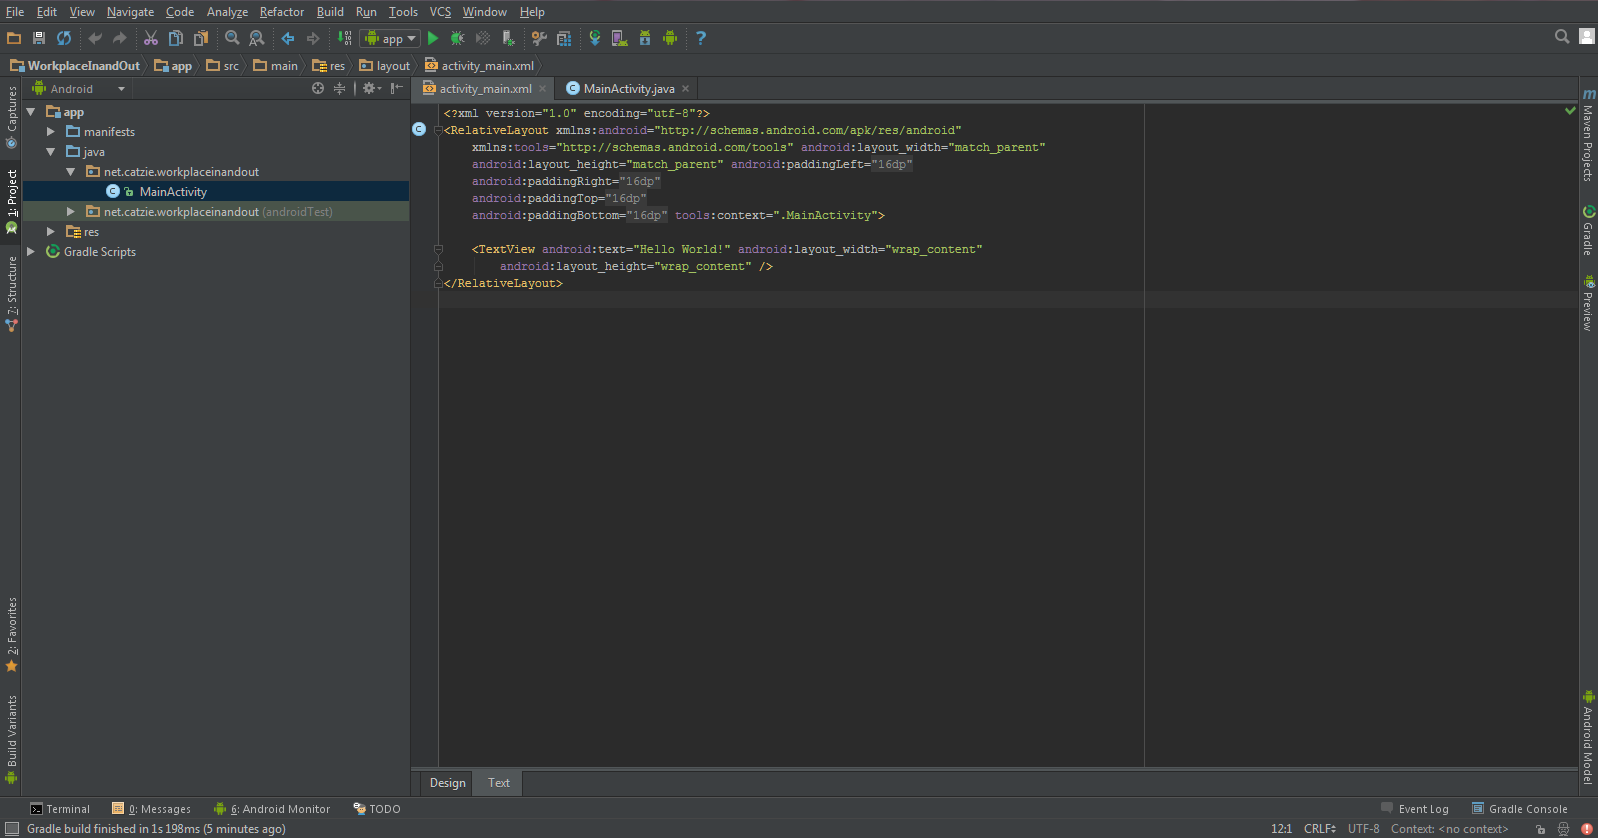
    You might feel more comfortable with a dark theme in Android Studio, but the default theme is light in color.

    Default light theme in Android Studio
    Default light theme in Android Studio

    I’m one of the developers who always code in dark screens since it’s less tiring to the eyes.

    Android Studio dark theme
    Android Studio dark theme — Darcula

    If you’re like me who prefers dark themes while coding, then I’ll show you how to change into a dark theme called Darcula in Android Studio here. (more…)

  • How to change app name in Android Studio

    How to change app name in Android Studio

    I’m trying to learn how to build a simple app in Android just to satisfy my curiosity. This will also be a very handy skill because I use Android phones often, and there are times that the apps I download from Google Play Store lack features that I need.

    This will be a very simple guide on how to change app name in Android Studio, something that most beginners in Android development probably want to know.

    It is assumed in this guide that you have prior knowledge in coding.

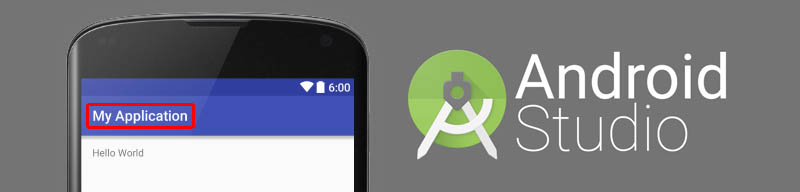
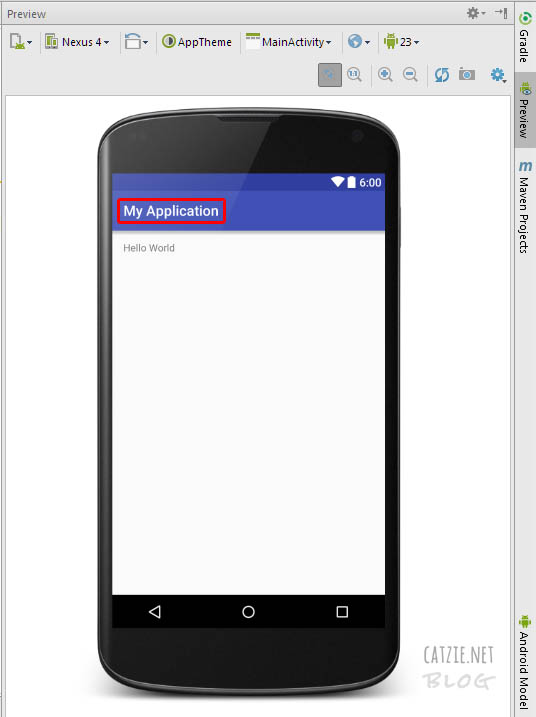
    The app name that I’m referring to is the one that says “My Application”, as marked on the image below:

    How to change app name in Android Studio

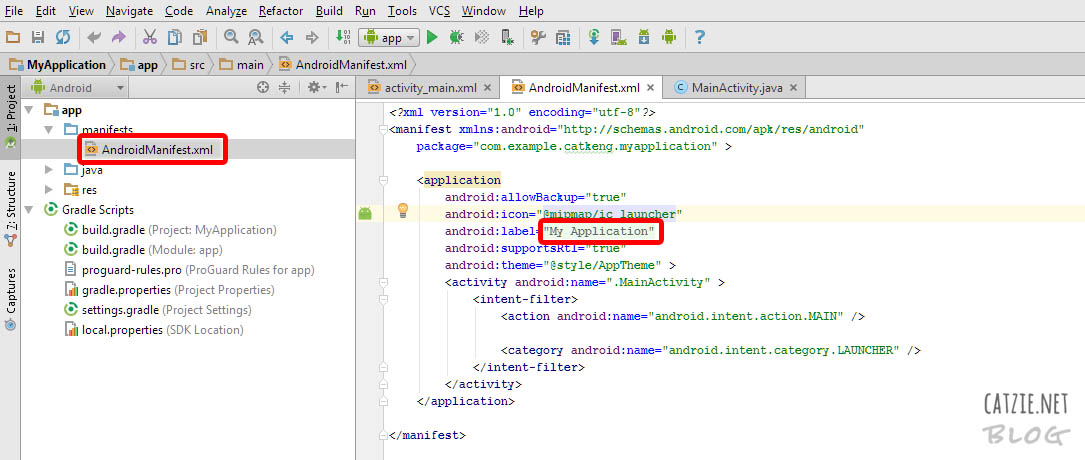
    To change that, go to your Project and find the app folder. Under app, find AndroidManifest.xml and edit android:label="My Application", replacing “My Application” with the name you’d like to use.

    Refer to the image below:

    android-studio-android-manifest

    Your changed app name should be reflected in the live preview now, if you have it activated. If you don’t have live preview yet, check this out: Where is Android Studio layout preview?

    Updates…

    How to rename project folders of Android Studio

    You may also want to change the name of your Android app’s folder. Check this folder, it’s probably where your Android project folder is located — C:\Users\catkeng\AndroidStudioProjects\

    How to rename package in Android Studio

    Right-click on your package name in the Project tree. It’s probably under app->java. Then choose “Refactor”, then choose “Rename”. Take note that you’ll see “Rename package” and “Rename folders” button here — you might need to go back to this screen later to click “Rename folders”. For now, click the “Rename package” button. Type the new name that you want to use, then click “Refactor”. If that hasn’t changed all package name instances for you, follow the same steps until you can click “Rename folders” button too. That should do it!