Category: Technology

  • SSH without password: PuTTY or Git Bash

    SSH without password: PuTTY or Git Bash

    We access remote Linux servers everyday from our Windows computers. Having different servers for different projects, it can be difficult having to enter the passwords over and over in everyday. And so, I suggest that we use SSH Keys instead for authentication to save us some time and boost productivity. SSH keys should also make logins more secure than passwords — just be careful when someone else uses your computer.

    I’ll show you two methods that we can use to connect to our Linux servers using SSH keys and without a password.

    Method 1: PuTTY
    Method 2: Git Bash

    Requirements for this tutorial:

    I personally like using Git Bash to connect via SSH to our server because it’s done in fewer steps than when using PuTTY, but in this tutorial I will first show you password-less connection to SSH via PuTTY.

    Method 1: SSH Connection without password in PuTTY

    1. Download PuTTY from the PuTTY Download Page if you haven’t yet. No installation is required — you just run this .exe file when you need it.
    2. You also need PuTTYgen so if you don’t have it yet, download PuTTYgen from the PuTTY Download Page. This is the PuTTY Key Generator, and will be used to generate a key later. Like putty.exe, no installation is needed for this.
    3. Right click on puttygen.exe then run it.
    4. Make sure that under Parameters, SSH-2 RSA is selected, then click the Generate button. Move your mouse pointer all over the blank area to hasten the key generation.
    5. Copy the generated key, edit the Linux server’s authorized_key file in the .ssh folder (e.g. /home/username/.ssh), and paste the generated key into it. If the .ssh folder or authorized_key  file do not exist yet, create a .ssh folder with permission 700, then create the file authorized_key file with permission 600.
    6. In PuTTY Key Generator, click “Save public key” and save it as a .txt file.
    7. Still in PuTTY Key Generator, click “Save private key” and save it as a .ppk file. It’s recommended for you to save a passphrase for the private key.
    8. Now, run PuTTY. Go to Connection -> SSH -> Auth. Click the browse button to find and select the private key (.ppk file) that you saved in the previous step.
    9. From Connection, go to Session so that you can connect to the Linux server via SSH. Enter the host name or IP address then click Open.
    10. Enter your username.
    11. You should be logged in now without being prompted for password. I think you need to select the .ppk file under Connection -> SSH -> Auth each time you will log in.

    Method 2: SSH Connection without username & password in Git Bash

    1. Install Git on your Windows computer if you haven’t yet. Download Git here. During setup, I didn’t change any setting aside from ticking the “Enable file system caching” checkbox.
    2. If a .ssh folder doesn’t exist yet under C:\Users\<YOUR-WINDOWS-USERNAME>\ then please create it. (I used the browser for Local Site in FileZilla to create .ssh folder)
    3. While inside the .ssh window, right click then choose Git Bash Here.
    4. Run this command: ssh-keygen -t rsa -C "[email protected]", then type the file name for your key (we’ll use this in a config file later), and then type the passphrase that you want to use, twice.
    5. Create a file named config, with no extension name, under the .ssh folder. (FileZilla’s browser for Local Site might help again)
    6. Paste the following into the config file and edit as necessary. <NAME_OF_SSH_KEY> should be the file name you typed earlier after the ssh-keygen command.
    7. Open the .pub key file that you just generated in C:\Users\<YOUR-WINDOWS-USERNAME>\.ssh\ and copy its contents.
    8. Edit the Linux server’s authorized_key file in the .ssh folder (e.g. /home/username/.ssh), and paste the key from the .pub file into it. If the .ssh folder or authorized_key  file do not exist yet, create a .ssh folder with permission 700, then create the file authorized_key with permission 600.
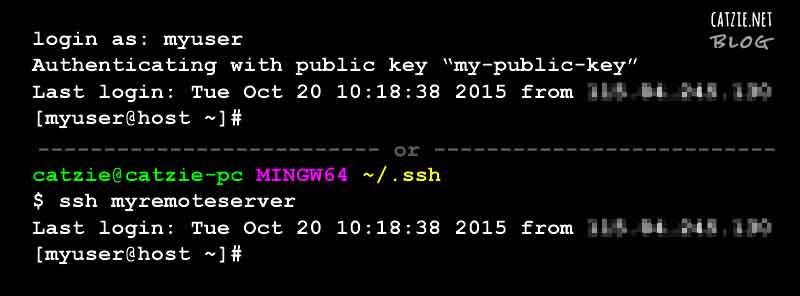
    9. Run Git Bash then enter this command: ssh <LABEL_FOR_CONNECTION> The label for connection should be as set in the config file. If you set a passphrase, you will be prompted for that too.
    10. Just run the same command in Git Bash each time you want to start the connection.


    Resources:

    Let me link to the web pages that helped me complete this tutorial:

    HOW TO PASSWORDLESS SSH LOGIN – Server Mom explains how passwordless SSH connections work and will teach you how to implement a Linux to Linux or Windows to Linux connection. This page mostly helped me with Method 1: PuTTY.

    Adding SSH Keys to Authorized_Keys – this page was my reference for chmod settings

    Simplify Your Life With an SSH Config File – helped me complete the Method 2: Git Bash.

  • Google Maps get coordinates on click or drag and drop

    Google Maps get coordinates on click or drag and drop

    With this tutorial you’ll see how we can place a Google map with search box on your web page, and then get coordinates (i.e. latitude and longitude) based on where you click or where you drag and drop the marker into. The JavaScript API of Google Maps will help us achieve this.

    This kind of map will be useful if you want to save coordinates from a Google map into your database. For example, if you’d like to save coordinates of a user-defined location, you can incorporate this map into your registration process — ask your users to point the marker to their location by clicking on the map or by dragging then dropping the marker.

    There will be two types of icons in this map. First, a red default marker. Wherever you move it, we’ll get the coordinates that it points to. Second, white square markers which will appear to point to the location you searched for using the search box.
    Map Demo

    Try the map below — this is more or less how our map will look like later at the end of this tutorial. 🙂 Please read on and soon I’ll share the codes with you.

    Get coordinates from Google Map

    Latitude:   Longitude:


    Click on any point or drag the marker to get coordinates.


    This tutorial will cover the following:

    • Google map on a web page
    • Search box for map
    • Get map coordinates on click
    • Get map coordinates on drag and drop of the marker
    And you will need these:

    • Familiarity with HTML and JavaScript
    • Internet connection
    • Google account
    • Development environment (I used XAMPP on Windows 7 for this)
    • Code editor (I use Sublime Text)

    (more…)

  • Log the date & time each time you turn on your Windows computer

    Log the date & time each time you turn on your Windows computer

    In the morning, I sometimes forget the time I log into the time-tracking system in my workplace so I stay a bit longer to make sure I don’t get an “undertime”.

    I thought that my computer at work could help me with this issue somehow. I hoped there was a Windows program that can record the dates and times I turn my computer on. I tried searching for an application like this on Google but couldn’t find any, and wasn’t sure what keywords to search for. (^_^) Someone suggested that I make a Windows Batch File. And so after some web search I came up with this Windows Batch File, which I will later set up to be run each time Window starts.

    This Windows batch file doesn’t tell me exactly what time I came into the office, but it helps, because it logs the date and time I turned my computer on. And turning my computer on is the first thing I do on my office desk. 🙂

    What is a Windows batch file?

    How does this Windows batch file work?

    The Windows batch file is run every time Windows starts, and each time the file is run, it gets the current date and time then saves it into a file. Each time Windows starts, it creates one file with the date and time.

    Like I said, turning my computer on is the first thing I do when I arrive at the office, so the time in the text file written by the program gives me an idea of the approximate time I came in.

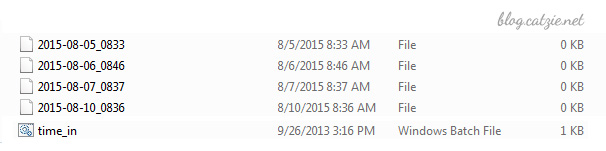
    Here’s a preview

    Save files with current date and time with Windows batch file
    Save files with current date and time with Windows batch file
    of the results:

    How to make a batch file that logs current date & time when Windows starts

    Before we begin, please note that I implemented this in a Windows 7 machine.

    Create a folder where you’d like the files to be created. Name it anything you like. I named mine “Time-in” since I’m using the batch file to estimate the time I come into the office.

    Open a text editor such as Notepad.

    Copy the following codes and then paste it into Notepad.

    Save it into the folder you created as “time_in.bat”

    Now, go to that folder and right click on the icon of “time_in.bat” then choose “Create Shortcut”.

    You’ll now see a new file “time_in.bat – shortcut”. Move that shortcut file into your Windows’ startup folder. My Startup folder is in C:\Users\MyUserName\AppData\Roaming\Microsoft\Windows\Start Menu\Programs\Startup so try looking for yours there.

    With what we have done, a file named with current date and time should be created in your folder each time you start Windows.

    Some notes when using this Windows batch file

    You will eventually have a folder with a large number of files because our batch file creates one file per Windows startup. Please find a way to manage those files. You may move older files into an archive folder, or you may delete older files that you no longer need.

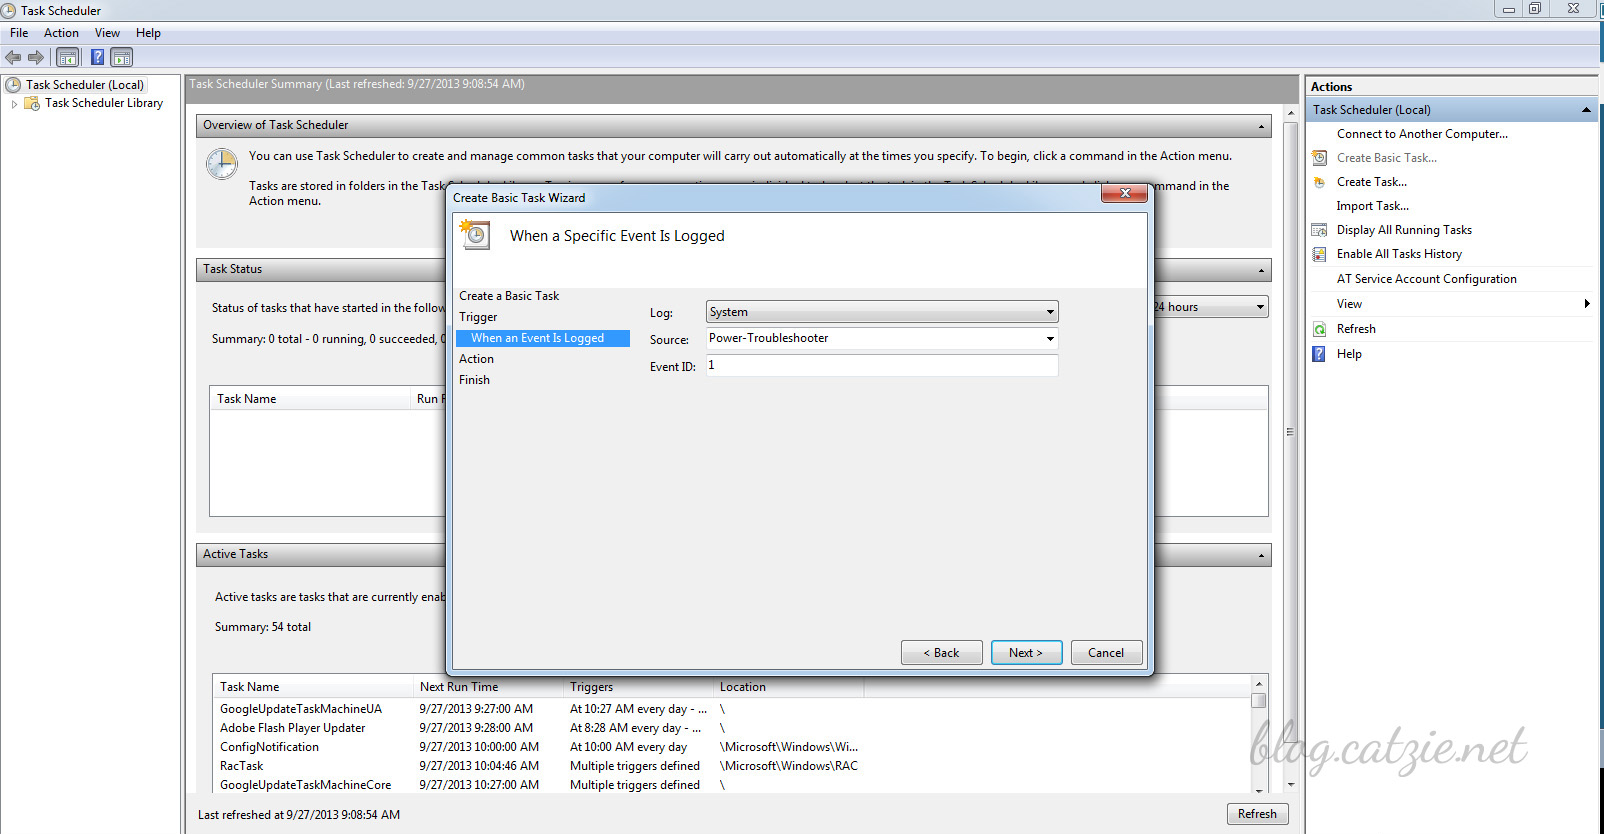
    Another note if you’ll use the batch file to track your office time in the morning like I do: the batch file will not create any file if you just hibernate your computer before leaving work instead of shutting down. This is because the “startup” only happens when you start Windows, and this does not happen when you wake your Windows up from hibernation. Possible solution for this may be creating a task in the Task Scheduler of Windows, making the “on wake up” the “trigger” and pointing to the batch file to let it execute. The following settings are what I’ve tried and nothing has worked yet so far… so maybe some of you may come up with a solution that will work. 🙂

    Task scheduler in Windows 7 for the batch file
    Task scheduler in Windows 7 for the batch file
    • Go to Task Scheduler
    • Create Basic Task
    • Fill out name and description
    • Start the task when a specific event is logged
    • Log: System
    • Source: Power-Troubleshooting (or try Kernel-Power with Event ID 42, or try Kernel-General with Event ID 1)
    • Event ID: 1
    • Action: Start a program (then choose program).
    • Finish

    The batch file’s function is good the way it is for me so I didn’t look further into it, but here’s a link to Trigger Task Scheduler in Windows 7 when computer wakes up from sleep/hibernate.

  • How to make a basic “Login via Facebook” with PHP & JavaScript

    How to make a basic “Login via Facebook” with PHP & JavaScript

    You’ve seen how some popular websites let you register or login via Facebook — Pinterest, Vimeo, Lifehacker, and many more.

    In this blog post, I’ll show you the very basic setup of the Facebook login button for your website. It is up to you to enhance the functions of your registration system.

    Note: There are periodic updates to the Facebook API, sometimes resulting to issues with previously working implementations of the API. So please note that this tutorial was written in the third week August 2015. 🙂

    I began writing this tutorial late in August, but because of other projects, was able to publish it when it’s already September.

    (more…)

  • How to install Laravel 5 in Windows with XAMPP

    How to install Laravel 5 in Windows with XAMPP

    This short tutorial is based on my own installation of Laravel 5 on XAMPP that is running on Windows 7.

    In this Laravel 5 tutorial, you will need:

    There have been major changes in the following: New Folder Structure, Contracts, Route Cache, Route Middleware, Controller Method Injection, Authentication Scaffolding, Event Objects, Commands / Queueing, Database Queue, Laravel Scheduler, Tinker / Psysh, DotEnv, Laravel Elixir, Laravel Socialite, Flysystem Integration, Form Requests, Simple Controller Request Validation, New Generators, Configuration Cache, Symfony VarDumper.

    To learn more about the Laravel 5.0 update, read about it here.
    (more…)

  • SSH: Basic usage of Shell Screen

    SSH: Basic usage of Shell Screen

    If you are often running scripts in SSH, especially ones that have a long execution time, you might have experienced termination of your script before it actually finishes its task(s). Maybe you closed the terminal window by accident, or you lost Internet connection for a moment.

    What you can do is run your script persistently with the help of Shell Screen.
    (more…)

  • Kimstore experience: cash on delivery via LBC

    Kimstore experience: cash on delivery via LBC

    PhotoGrid_1436011698555
    I ordered an LG phone on June 29, Monday, from the Kimstore online shop around 2:30 pm. I chose CoD (Cash oj delivery) as payment method. An email was sent to me, asking me to confirm my order.

    Order confirmation was done by copying details from support(at)theshop.ph which I pasted to an email i sent to help(at)theshop.ph.

    The email I sent opened a ticket in the system of Lovable Commerce. After 2-3 hours, someone replied to the ticket and told me that they would check first with Kimstore if my ordered product is in stock and that they would get back to me in 24 hours. The order could be cancelled before 2pm the next day.

    On June 30 (34 minutes after 24 hours – a little late), I got another reply in the ticket which included the LBC tracking number. I was given the following info:

    1. You may expect the item within 1 to 3 business days
    2. Prepare exact amount only
    3. In case you are not available, kindly leave a signed authorization letter with 2 of your valid ID’s to the recipient
    4.COD purchases will be delivered anytime within the day of delivery. There is no exact delivery time.
    5. You may track the package through lbcexpress.com click track and trace
    6. After 2 failed delivery attempts, item will be returned back to shipper and order will be cancelled
    7. Order status will only change once payment has been received and remitted to us

    I was expecting that the package would arrive at the shipping address on Friday, but on July 1 (Wednesday) morning I got a call from LBC, asking me if I would be at the address the entire day because my item will be out for delivery! 🙂 That was so quick – only 3 days of transaction. 😀

    Before handing over the money to the delivery man, I first checked the contents of the phone’s package – the phone, battery, earphones, manual, and the official receipt for 1 year service warranty. I turned the phone on, and it seemed good. And oh, the package included a SMART Bro Prepaid SIM with LTE, with free 200MB every month for 3 months.

    The delivery man told me that so far, he hasn’t delivered any defective item from Kimstore.

    Conclusion on my first Kimstore experience: I will definitely buy from Kimstore again! Most likely from the online store because their usual “meetups” don’t fit my schedule. The transaction was fast, the product was much cheaper than when purchased at a mall, and the product reached me in good condition. 🙂

  • Mobile Prefixes in the Philippines (Sun, Smart, Talk ‘N Text, Globe, TM)

    Mobile Prefixes in the Philippines (Sun, Smart, Talk ‘N Text, Globe, TM)

    When someone texts us and we need to reply, or when we need to call someone, but we’re not sure if they are using the same mobile network provider, we hesitate to do so. Possibly because of charges or higher charges.

    Use the tool below to lookup the mobile network provider of a mobile prefix. You can type “0922” or “Sun” to search for data.

    I made the tool using HTML and JavaScript. Pretty simple.

    mobile prefixes philippines
    Reset

    Mobile Network Provider Mobile Prefixes in the Philippines
    Loading…

    I’ll try to update the “mobile prefixes in the Philippines” list when I can. 🙂

  • GrabTaxi: I could never successfully book a taxi :(

    GrabTaxi: I could never successfully book a taxi 🙁

    grab taxi

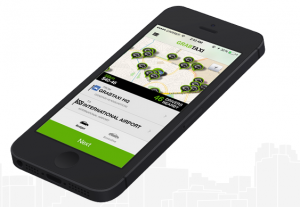
    I always wanted to try the GrabTaxi app. Booking from them is expensive, but security is an important thing that they can give passengers so that’s okay. But my attempts have never been successful. I think it’s a combination of bad signalling from GrabTaxi and bad internet connection in my house.

    (more…)

  • Facebook App Development tips, guides, and possible solution to issues

    In July 2013, I began learning about developing apps that run in Facebook. For a web developer especially one who works in a marketing agency, learning about Facebook app development is important nowadays because numerous amounts of campaigns are ran on Facebook.

    At first Facebook app development confused me, but after some exposure to it and some help from colleagues who have been doing it for years, I got the feel of it.

    Following are some blog entries on my Code Playground that are related to Facebook app development. (more…)